Showing posts with label For The Tastebuds. Show all posts

Wednesday, September 24, 2008

Sticky Buns

Tried this today. I absolutely recommend it! Yum!


Ingredients
  • 1-1/4 teaspoons active dry yeast
  • 1/4 cup warm water (45 degrees C)
  • 1/2 cup and 2 tablespoons buttermilk
  • 1 eggs
  • 2-3/4 cups all-purpose flour (I used bread flour)
  • 1/4 cup margarine, softened
  • 1/4 cup white sugar
  • 1 teaspoon baking powder
  • 1 teaspoon salt

  • 1 tablespoon margarine, softened
  • 1/4 cup white sugar
  • 1 teaspoon ground cinnamon

  • 1/4 cup melted butter
  • 1/4 cup packed brown sugar
  • 1/3 cup chopped pecans (I used walnuts, as always!)

Directions

  1. Dissolve yeast in warm water in a large mixing bowl. Add buttermilk, egg, 1 1/2 cups flour, 1/4 cup margarine, 1/4 cup white sugar, baking powder and salt. Blend 30 seconds with mixer on low speed, scraping sides and bottom of bowl. Beat 2 minutes on medium speed.
  2. Stir in remaining 1-1/4 cups flour. Dough should remain soft and slightly sticky. Knead for 5 minutes, on a lightly floured board.
  3. Form dough into a round and place it in an oiled bowl. Cover it with a damp cloth and leave it in a warm place to rise until doubled.
  4. Roll dough into a 12x7 inch rectangle. Spread with 1 tablespoon soft margarine, and sprinkle with 1/4 cup white sugar and 1 teaspoon cinnamon. Roll up, beginning at wide side. Seal well by pinching the seams. Cut roll into 12 slices.
  5. Coat a 9 inch round cake pan with 1/4 cup melted butter, 1/4 cup brown sugar, and 1/2 cup chopped pecans/walnuts in each pan. Place 12 dough slices in each pan, leaving a small space between slices. Let rise until doubled.
  6. Bake in a preheated 190 degrees C oven for about 25 minutes. Invert pan onto serving plate.

Wednesday, September 03, 2008

Kuih Cara Manis

Just wanted to share with you this recipe that I tried yesterday.

Cantik pulak gambar guna my Sony this time..

It's an easy recipe for kuih cara manis.


The recipe instructed to 'blend' the batter but I simply whisked it manually till my arm (nearly) came off. After all,
orang dulu-dulu didn't need no blender, ye tak?

The kuih turned out really nice, if I may say so myself.
Saying that, Big H didn't like it much, although Little H kept returning back to the kitchen for more and more.. :)

You need to get the moulds to make this one, of course. I think you can get these moulds easily back in Malaysia if you look for them. You can also, of course, use the mould to make bahulu or kuih cara berlauk as well so rest assured your investment in such a mould would be worthwhile...he he he..

They're cheap anyway.

Righty-ho..let's get down to the recipe!


2 cups flour

3.5 cups santan
(coconut milk)
1 egg

Some pandan juice..or just the paste - you can easily get this anywhere.

salt


sugar

oil

Blend the top 5 ingredients all together. Mixture will be thick-ish. Sieve into another bowl or a measuring cup (easier to pour later). Oil the mould and heat it up - once hot, make sure to turn the fire down and keep it low. Pour batter into each mould and then sprinkle or spoon some sugar onto each one. Cover. It will be ready in a few minutes, when the middle is fairly dry and you can see that the sides have browned a bit. Use a spoon to scoop it out gently. Stick two together to make green eggs...or so my son called them..


Told you it's easy!


Try it! InshaAllah you wont regret it.

Friday, June 20, 2008

Kuih Kasui


It's been a long time since I last put up a recipe. It's not that I have not been cooking - I have been cooking quite a bit lately - but it's because of the orders I get.

Yes, I have been doing some catering (with a friend) lately and have been taking orders too for my baking!


How exciting is that? :)

Well, very, very exciting - for me, at least.


Due to the nature of the business, I am more inclined to cook more Malaysian flavours nowadays - my friend is an expert in Beriyani Johor so I guess that is our speciality at the mo, but we also cook all sorts of stuff so anyone out there who may be interested in our catering, big or small, feel free to contact me via this blog or email!

That's my bit of advertising done.

I know that some people may think that one shouldn't share recipes if one is in the food business but I believe that all beneficial knowledge should be shared and spread around...after all, all this knowledge is from Allah and it won't be any use to any of us in the hereafter right? On the contrary, lagi banyak dapat pahala if we share our knowledge together, I think... :)

So here's my Kuih Kasui recipe for you to try.

The recipe originally came from an aunt who is a connoisseur of malay foods but I have tinkered with it a little as her recipe was not exact , as normally old recipes are and I think the result is pretty good.

The trick for the kasui is to make sure the batter is not thick AT ALL. Otherwise the kuih will be pretty hard and tak sedap.

Here's the recipe:

1.5 cups plain flour
1.5 cups rice flour
0.5 cup tapioca flour/ tepung sagu
0.25 cup sugar
2.5 cups water
1 Tbs lye water/ air kapur/ alkaline water

*1 cup brown sugar/ gula melaka
*2 cups water

Boil * until dissolved and leave to cool.

In a medium size bowl, mix all the other ingredients, blend well (in a blender or just use a whisk, which I did). Add the cooled sugar mixture, mix well and sieve into another bowl. Let rest for half an hour.

Heat up the steamer. Make sure your apam moulds are oiled lightly before pouring the batter into them so that the kuih will be easy to take out. Pour the batter into the moulds using a measuring cup - it's easier that way. Cook for about 20-25 minutes.

If you use a tin, you have to wait for the kasui to cool before cutting it I think. But if the mould is used, you can straight away use a knife/ spoon to scoop it out really, without ruining the kuih much.

Don't forget the coconut on top. That should be steamed too for about 10-15 minutes (to make it last longer) with a little bit of salt. If you use dessicated coconut, steaming is a very good way to soften the coconut bits and transform it into something similar to freshly grated coconut.

Good luck!

Monday, November 12, 2007

Pasembor

Craved for a rojak pasembor during Ramadhan just like the one our pakcik kantin at school used to make during the weekends. Got this recipe from myresipi.com - tried a few times already with wonderful results and praises from Mr S and friends. Just had to share it with you!

p/s: Our pakcik kantin left out the cucur kelapa and added things like tempe and kacang panjang rebus...so that's exactly what I did!

Bahan-bahan

**Bahan cucur udang**
  • 1 1/2 cawan tepung gandum
  • 1/2 cawan udang
  • 2 biji bawang kecil
  • 1 sudu besar cili boh
  • garam
  • air untuk bancuh tepung
  • 1 1/2 sudu kecil baking powder

**Bahan cucur kelapa**
  • 1 cawan tepung gamdum
  • 3/4 cawan kelapa (saya guna kelapa kering jerr)
  • garam
  • air untuk membancuh

**Bahan kuah**
  • 1 biji keledek sederhana besar (direbus hingga empuk)
  • 2-3 biji bawang kecil
  • 1 sudu besar cili boh (terpulang pada citarasa masing2 kalau nak pedas)
  • Sedikit kicap
  • Air untuk kuah
  • 1/2 cawan kacang tumbuk
  • minyak untuk menumis
  • gula merah & garam secukup rasa

**Bahan lain**
  • 3 biji kentang sederhana besar
  • 4 biji telur
  • 4 keping tauhu
  • 1 biji timun
  • 1 biji sengkuang
  • sedikit taugeh
  • Minyak untuk menggoreng

Cara-cara

  1. Bersihkan kulit kentang kemudian rebus kentang bersama kulitnya sehingga empuk. Kemudian goreng kentang tersebut bulat2 sehingga kekuningan (tak payah potong2).
  2. Telur direbus (hard boil), kemudian buang kulit & digoreng bulat2 sehingga kekuningan.
  3. Tauhu digoreng sehingga kekuningan.
  4. Sediakan cucur udang. Gaulkan semua bahan cucur udang. Bancuhan seperti nak buat cekodok. Kemudian goreng dalam minyak panas sehingga kekuningan/ masak.
  5. Sediakan cucur kelapa. Satukan semua bahan. Bancuhan jgn lembik sangat, agak2 boleh kepal. Buat bentuk leper, kemudian goreng sehingga kekuningan/ masak.
  6. Sediakan kuah. Tumis bawang sehingga wangi, masukkan cili. Blend keledek dengan air, kemudian masukkan dalam tumisan. Masukkan juga Kacang, garam & gula. Masukkan juga sedikit kicap (just nak bagi color jerr). Masak hingga mendidih. Kalau nak pekat, boleh letak lebih keledek.
  7. Cara nak hidang, potong semua bahan2 yang telah digoreng tadi. Timun & sengkuang dihiris. Gaulkan semuanya. Taugeh dicelur sedikit. Tuangkan kuah ke atasnya.

Friday, August 10, 2007

Fab Oatmeal Cookies


Ingredients
  • 1 cup butter, softened
  • 1 cup packed light brown sugar
  • 1 cup white sugar
  • 2 eggs
  • 1 tsp vanilla extract
  • 2 cups all-purpose flour
  • 1 tsp baking soda
  • 1/2 teaspoon salt
  • 3 cups rolled oats
  • 1/2 cup semisweet chocolate chips
  • 1 cup raisins
  • 1/2 cup chopped pecans

Method:
  1. Preheat the oven to 175 degrees C.
  2. In a large bowl, cream together the butter, brown sugar, and white sugar until smooth. Beat in eggs one at a time, then stir in vanilla. Combine the flour, baking soda, and salt; stir into the creamed mixture until just blended. Mix in the oats, pecans, raisins and chocolate chips one at a time. Drop by heaping spoonfuls onto prepared baking sheets.
  3. Bake for 8-10 minutes in the preheated oven. Allow cookies to cool on baking sheet for 5 minutes before transferring to a wire rack to cool completely.
Prediction: You will get lots of praises for this one, especially when it's just cooled and fresh out of the oven!

Thursday, July 05, 2007

New York Cheesecake With Raspberries

As promised, here is the recipe of the cheesecake in the picture. It's my third try for baked cheesecakes in general but this is my first attempt using this recipe.

The cake turned out nice. I did not really follow the exact instructions to avoid cracking and the cake did crack just a little at the top but I covered it up with some leftover sour cream (you can use whipped cream too, for this purpose) and it looked perfect (well..nearly).

I also used only half a cup of jelly hence perhaps the reason why there is not enough liquid jelly available for the 'spilled over look' at the sides of the cake. Maybe next time.

Overall I think this is indeed an easy recipe and will probably bake this cake again and again in the future whenever I have a hankering for baked cheesecake.

You know how you love to eat those cheesecakes you bought at those shops in KL or even that popular one that boasts of the best cheesecake in town? Well, in my opinion, nothing beats a home made cheesecake. Actually, nothing beats a home made ANYTHING - there is that magical 'home made' taste to it that no shop can outdo and something that shop kitchens can only dream of achieving...and of course, there is that satisfaction of baking something wonderful for your family and loved ones.

You should try it.


Ingredients
  • 11/2 cups of digestive biscuits crushed
  • 1/4 cup butter, melted
  • 1/2 tsp ground cinnamon
  • 1/4 cup sugar

  • 900g cream cheese
  • 1 1/2 cups white sugar
  • 3/4 cup milk
  • 4 eggs
  • 1 cup sour cream
  • 1 Tbs vanilla extract
  • 1/4 cup all-purpose flour

  • 1 cup of raspberry or strawberry ready made jelly
  • fresh raspberries

Method
  1. Preheat oven to 160 degrees C. Grease a 9 inch springform pan or line the bottom and sides with foil. I prefer the latter for easier 'handling'.
  2. Mix digestive biscuits crumbs with melted butter, ground cinnamon and sugar. Press onto bottom of springform pan.
  3. In a large bowl, mix cream cheese with sugar just until smooth. Blend in milk, and then mix in the eggs one at a time, mixing just enough to incorporate. Mix in sour cream, vanilla and flour until smooth. DO NOT overbeat! Pour filling into prepared crust.
  4. Bake in preheated oven for 1 hour together with a bowl of water at the bottommost rack of the oven. Turn the oven off, and let cake cool in oven with the door closed for 5 minutes before running a greased knife around the side of the cake. Close the door again and leave the cake in the oven for at least 3 hours. (All these steps are to prevent cracking.)
  5. Chill in refrigerator.
For topping:
  1. Melt the jelly in a small pan.
  2. Put the berries in a bowl and pour the liquid jelly onto it, mix well.
  3. Decorate cake.

Tuesday, May 29, 2007

'Ayam Kuali'

I have had A LOT of request for this recipe and so I will share it, even though Mr S has confided in me his little dream about a restaurant that specialises in these dishes - no doubt due to the very 'healthy' response to the pic of this dish in a previous post and also due to the response of our guests each time I cook this dish.

Not to mention, of course, Mr S's 'healthy' imagination as well!


This dish is mild and best eaten with chapattis, in my opinion. It's delicious and easy, not to mention it does not require the normal coconut milk that we Malaysians just love to put in our dishes..

It's something different. Try it!


Chicken Karhai
(literal translation: 'ayam kuali' - so make sure you use a kuali/wok for this one!)

Ingredients:
cooking oil

3 fresh tomatoes, diced

garlic and ginger paste
crushed chillies (looks similar to the ones you get at pizza hut
)
turmeric powder

salt

Chicken - 4-5 pieces of chicken, cut into small pieces

1-2 Tbs fresh yoghurt

coriander leaves, sliced
green chillies, sliced


Method:

Heat up the oil in your wok. Fry the tomatoes, turmeric, salt, ginger and garlic paste and the crushed chillies. Stir a little and fry on medium fire until the juice of the tomatoes dries up a bit - add chicken.

Cook the chicken on high fire for 2-3 minutes and then cover, on low fire until the chicken is thoroughly cooked. Don't forget to turn the pieces over once in a while!


Increase fire. Add fresh yoghurt. Stir for 2-3 more minutes. Add the sliced coriander leaves and sliced green chillies. Stir for another few minutes.


Done! That was easy, wasn't it?

Good luck in trying and hope you LOVE it!

Friday, May 11, 2007

Chapattis!

This is something I learnt from a friend here, who hails from Karachi so I guess this is how they make it there. This is the simplest and most delicious and healthy 'roti' ever (not that I have much experience with them) because it uses no oil whatsoever and on top of that, you can choose to use a wholemeal atta flour for it and reduce the salt.

Just thought I'd share this simple recipe with you!


2 cups of atta flour, salt to taste and 1 cup of warm water. Add salt into the flour. Add water little by little, using your clean hands to mix and make a dough.

The measurements above are my measurements, I just make them using the same amount every time to make sure that the amount of chapattis I get is the same. The measurements above are for 2 large chapattis and 2 small ones (by 'large' I mean, very large for Mr S and I!).


I usually only need a little less than 3/4 cup of the water to achieve the above. There is almost no need to knead the flour - just once or twice will do and then..


..bring your bowl and the cup of water down to the floor! Yes, this is really the best place to do it because you can use your weight when 'punching' the flour, as in the picture above. Scoop a little bit of the warm water with your hand and pour it onto the dough before you start punching (by the end of it, the water that you have used is probably around 3/4 of a cup). Punch the dough - your bowl will automatically turn around like a wheel as you punch with both hands, the movement assisting your punching.


Once the dough is flattened, gather the dough and knead once or twice before doing the punching routine once again, with/ without scooping more water onto the dough - it's okay if the dough is a little wet.


Gather the dough again and knead once or twice before transferring the dough into a clean bowl and leaving the dough slightly covered for at least 10 minutes ( I like to leave it for 30 minutes). At this stage, the dough is a little wet and sticky, UNLIKE normal bread dough that is smooth and shiny.


Ready to roll? Pinch a portion of dough, to fit the palm of your hand for a large chapatti and a slightly smaller one for a small chapatti. (The dough size above in the pic is for a small size chapatti.) Roll the dough around in your hand to make a ball - this will help the shape of the chapatti to be nice and round later!


Heat up your pan - fire must be medium and pan must be really hot when dough is laid on it. Don't put any oil in your pan - there is no need! Sprinkle some of the atta flour onto your rolling board. Before rolling with the rolling pin, press down the dough ball with your fingers first to flatten it - to prepare it for rolling. Try to maintain a nice and round shape while flattening with your fingers and also later while rolling. Don't roll too thin and not too thick either..hmm..you know what I mean.


Once the chapatti is turned and cooked front and back, remove from pan and wrap/roll it in a clean kitchen towel and chuck it into a plastic container - to try and retain its heat while you cook the rest of the chapattis - other better methods are welcome, of course e.g. a heat retaining container is probably better and one that I do not have!) Looky there (pic)! If the pan is hot enough your chapatti will 'inflate' and that's a sign of a good chapatti, apparently.


And finally, you can eat it with Mr S's favourite chapatti accompaniment, Chicken Karhai. Maybe next time I'll type out the recipe for this..

Friday, May 04, 2007

Dark Chocolate Cake

After such a long break from baking chocolate cakes, I made some dark chocolate cake with some chocolate cheese frosting a few days ago using the recipe below that I have always used and without fail result in a wonderful and moist cake.

Just thought I should put it under my recipes label (For the Tastebuds) with a picture of the cake (even if it is the last 1/4 of it!).


This recipe is very good and very easy - it is highly recommended. There is a slight presence of soda taste right after baking but somehow, after at least 1 day later this taste will disappear in my opinion. This cake is moist and the chocolate cheese frosting goes very, very well with it.
I normally bake this cake in 2 baking tins and sandwich both cakes with the frosting in the middle - the measurement for the frosting below is enough to do this.

For the pic above, I did not have enough cocoa powder left for the frosting so I guess that's why the colour of the frosting is not too dark. But the taste, I guarantee you, will make up for this.

As usual, with my plain butter knife doubling as my icing spatula, I can't seem to do the frosting on the side of the cake right (I think I need more practice with this frosting thing but my weight is increasing at an alarming rate due to all these cakes, so HOW..??) and instead just used a fork to do some err..'patterns'...

**Terasa segan lah pulak because many of my friends are getting so good at baking and cake deco!**

Anyway, here's the recipe for anyone who's interested in baking such a cake. It's really easy - Try it!

Ingredients:
  • 2 cups boiling water
  • 1 cup unsweetened cocoa powder
  • 2 1/2 cups all-purpose flour
  • 2 tsps baking soda
  • 1/2 tsp baking powder
  • 1/2 tsp salt
  • 1 cup butter, softened
  • 2 1/4 cups white sugar
  • 4 eggs
  • 1 1/2 tsps vanilla extract
Method:
  1. Preheat oven to 175 degrees C. Grease 2 - 9 inch round cake pans. In medium bowl, pour boiling water over cocoa, and whisk until smooth. Let mixture cool. Sift together flour, baking soda, baking powder and salt; set aside.
  2. In a large bowl, cream butter and sugar together until light and fluffy. Beat in eggs one at time, then stir in vanilla. Add the flour mixture alternately with the cocoa mixture. Spread batter evenly between the 3 prepared pans.
  3. Bake in preheated oven for 30 to 35 minutes or until you get a clean stick when cake is poked at the centre. Allow to cool.

Chocolate Cheese Frosting


Ingredients:
  • 225g cream cheese, softened
  • 4 tbls milk
  • 4 cups icing sugar
  • 1/4 cup butter, softened
  • 2 tsps vanilla extract
  • 1/2 cup unsweetened cocoa powder
  • 1/2 tsp ground cinnamon
Method:
In a bowl, beat together the cream cheese, 3 tablespoons milk, icing sugar, butter, vanilla, cocoa, and cinnamon to a spreadable consistency. Add in additional milk if necessary. For a darker frosting add more cocoa or up to 100 gms of melted chocolate. Spread onto cooled cake.

Tuesday, March 20, 2007

Carrot Cake updated

Tried the whole recipe last week and made 9 carrot cup cakes and one whole cake of a good size with the batter.

Remember when my frosting turned runny on my first try at making carrot cake frosting and I thought it was because I didn't have enough icing sugar? Well, on the second try it came out runny as well even when I made sure to follow the recipe exactly! I was quite depressed because I could not understand the reason for it but my husband pointed out to me that maybe, it is because of the cream cheese I had used - it was a '50% less fat' one. I thought it was quite possible, that - so, on the 3rd try, I used the normal Philadelphia cream cheese one and I found that he was right!

So much for trying to reduce the fat in my cakes.

Anyway, the cup cake idea was brilliant - cooked in circa 18 to 20 minutes - easy to give away and convenient 'to go'. And the taste, to me and Mr S, was fantastic. Will definitely make carrot cup cakes using this recipe again.

Tuesday, March 13, 2007

Chocolate Muffins Again!


My sons keep asking for more muffins and I tried this recipe given to me by a friend. These muffins are nice but they're not sweet enough for my sweet tooth, unfortunately. Used the new muffin cups I bought on ebay - muffins turned out nice and big but my sons couldn't even finish one whole muffin because they're just too big for them so I will probably stick with the normal paper cups that I have been using.

Feel really tired now - just finished baking my 3rd carrot cake for the month! Mr S is really addicted to them, I think. He informed me sadly last night just before he retired for the night that he finished the last slice from the last one.

So just had to bake for him another one today.

Have to post this pic for the moment and post the recipe for them soon, inshaAllah.

Friday, March 02, 2007

Carrot Cake Craving


I have been fasting for the past 2 days and as usual, when I fast, I get cravings.

I was hankering for some home made carrot cake. No choice - had to make them and it was my first time making one of these.

I have to say the cake turned out really wonderful - although not as thick as I would like it to be. But this is good because we normally end up giving away our 'thick' cakes anyway - because they last for too long otherwise.

The cheese frosting is a little runny. But this is because I had not much icing sugar left and had to use whatever that was available. But it tastes wonderful - more sweet cheese than cheesy sweet, if you know what I mean.

My mother would be proud of me if she tasted this cake.

Wish I could email her a slice.

Added (5/3/07)
I used 2/3 of each ingredient in the recipe below because this recipe is for a 9x13 inch baking tin. But I think it would be fine if you use a 9" tin and also fill a muffin tray to make some carrot cupcakes as well to give away to your in laws or something :)

I used a grater that's not too fine so I just chopped my grated carrots a little bit more to reduce the size of the carrot bits. And then I put them in a sieve and pressed down a little bit to reduce the juice - but I included about 2 Tbs of this juice back inside the cake mixture later.

In the brackets is the amount I used for the cake above.

Ingredients:

  • 4 eggs (3)
  • 1 1/4 cups vegetable oil (3/4 and a bit more)
  • 1 cup white sugar + 1 cup brown sugar (2/3 each)
  • 2 teaspoons vanilla extract (1 and 1/4)
  • 2 cups all-purpose flour (1 and 1/3)
  • 2 teaspoons baking soda (1 and 1/4)
  • 2 teaspoons baking powder (1 and 1/4)
  • 1/2 teaspoon salt (1/4)
  • 2 teaspoons ground cinnamon (1-1/4)
  • 3 cups grated carrots (2)
  • 1 cup chopped walnuts (2/3)
  • 1/2 cup butter, softened (1/3)
  • 225g cream cheese, softened (150g)
  • 3 cups confectioners' sugar (2.5)
  • 1 teaspoon vanilla extract (3/4)
  • 1 cup chopped walnuts (optional) (2/3)

Method:

  1. Preheat oven to 175 degrees C. Grease and flour a 9x13 inch pan.
  2. In a large bowl, beat together eggs, oil, white sugar and 2 teaspoons vanilla. Mix in flour, baking soda, baking powder, salt and cinnamon. Stir in carrots. Fold in nuts. Pour into prepared pan.
  3. Bake in the preheated oven for 40 to 50 minutes, or until a toothpick inserted into the centre of the cake comes out clean. Let cool in pan for 10 minutes, then turn out onto a wire rack and cool completely.
  4. To Make Frosting: In a medium bowl, combine butter, cream cheese, confectioners' sugar and 1 teaspoon vanilla. Beat until the mixture is smooth and creamy. Stir in chopped nuts. Frost the cooled cake.

Wednesday, February 28, 2007

Double Chocolate Muffins

Tried this during the weekend and my boys just loved them. I have to admit that I couldn't stop eating them too because they were so chocolatey (obviously because they had a whole bar of chocolate in them)! Try this recipe - the results will be good.

Note: For my first try (muffins in pic) I used plain cooking chocolate instead of unsweetened.

By the way, I am still looking for a darker coloured muffin...anyone with a good recipe?

Ingredients:

1/2 cup butter or margarine
100gm unsweetened chocolate, cut up
1 cup sugar
1 egg
2 teaspoons vanilla extract
Pinch of salt
1 cup buttermilk
2 cups flour
1 teaspoon baking soda
1 cup semisweet chocolate chips

Method:

Preheat oven to 200 degrees celcius.

In a large bowl, combine butter and unsweetened chocolate. Heat in microwave oven on high (100%) power for 1 to 1.5 minutes, until melted and smooth when stirred. Let cool to lukewarm (5 to 10 mins).

Stir in sugar, egg, vanilla, salt and buttermilk until thoroughly blended. Mix together flour and baking soda and stir into chocolate mixture until just combined. Stir in chocolate chips.

Spoon batter into muffin/paper cups, filling to top. Bake in preheated oven 15 to 20 minutes, or until a cake tester inserted into center comes out clean. Let muffins cool in pan 5 minutes, then transfer to cooling rack to cool completely.

Sunday, February 04, 2007

Apam Cantik Manis

Made some of these tonight for a gathering with some friends tomorrow morning. It's been some time since I made these - used to make them back at my mum's place for my kids and nephews and niece. It was difficult for me to find the recipe for this but I would like to share it with everyone and anyone who love these soft apams, just like me.

Ingredients:

3 cups flour
3 eggs
2 cups sugar
1 cup ice cream soda
1 Tbs ovalette
1 tsp vanilla essence (optional)
some food colouring; red or/and green

Method:
Start water boiling in steamer. Mix all ingredients above in a bowl using a mixer until batter becomes white and fluffy (looks similar to bahulu batter). Divide into separate bowls for separate colours. Spoon mixture 3/4 full into apam cups lined with paper cups. Steam for 10 mins.

Monday, January 22, 2007

Fish Ball Noodles

A fellow blogger mom asked for this recipe.

This is the basic recipe I used for my fish cake noodles - although, obviously, for the lack of many of the ingredients, I had to substitute and make do with whatever I had. By the way, I got the recipe from here.

For the noodles, I highly recommend using the one I have in the picture below. The noodles taste nice and light and my kids love them. I did not at all follow the exact measurements of this recipe, although, I did use it as a 'guide' to gauge how much of the ingredients are needed.

In the end, IMO, these things are really up to your own tastes and preferences when you cook - because you and your family are the people who are going to tuck in.

Would be really nice with some pickled green chillies, I think.


Ingredients:


* 2 tbsps cooking oil
* 2 cloves garlic, minced
* 1 cm ginger, minced
* 6 cups water
* 3 tbsps Concentrated chicken stock
* 1 tbsp sliced preserved cabbage (optional)
* 12 fish balls
* ½ tsp sesame oil
* Pepper to taste

* 300gm thin rice vermicelli (mai fun)

Garnishing:

* 1 cup bean sprouts, tailed and blanched
* 1 stalk celery, cut into 1 cm sections
* 1 stalk of scallion/spring onions, finely chopped
* ¼ cup sliced fried shallot

Directions:

1. Heat oil, stir fry garlic and ginger until aromatic
2. Add in water and bring to a boil. Add chicken stock and preserved cabbage, simmer for 5 minutes.
3. Stir in fish balls, sesame oil and pepper to taste; cook for 5 minutes until done.
4. When serving, place vermicelli into individual bowls. Add garnishing and pour hot soup over the vermicelli.

Sunday, January 14, 2007

The New Sotong Kangkung

The Xmas holidays for most schools here started on the 20th of December but the holidays, for me, really started 2 days later when my husband started his long Xmas cum New Year leave. But for us housewives, when everyone is at home – that’s when the work load is increased so yes, you guessed it – I was utterly knackered after the holidays. Thus the reason why I have not blogged for some time.

On the day my husband started his leave, our cousin, a medical student in Glasgow and her husband, also a medical student, were coming to visit and so being me, of course I just had to cook for them. And since it was the holidays, I also invited friends over on the same day for a simple potluck gathering. Yes, just potluck for I wasn’t feeling too enthusiastic about cooking for a dozen or more people when Raya Haji was just the next weekend.

And so the food that night was a variety of dishes. I kept it simple: I made nasi hujan panas, roasted mayo chicken, and cherry crumble for dessert. Also intended to make sotong kangkung but at the last minute we discovered that there were no sotong and no kangkung (and no tahu goreng as well) at the nearest Chinese supermarket and therefore I was forced to substitute these with fishcake and green beans and then added the other normal stuff like pineapple cubes and cucumber slices which are supposed to be in the sotong kangkung anyway – and Thank God and I am happy to report that it went down well! It was of course, no longer ‘sotong kangkung’ but a sort of rojak that my friends kindly named rojak fishcake .

That's right. Rojak Fishcake is the NEW Sotong Kangkung.

At least, over at my house it is.

The secret of any sotong kangkung or rojak buah is needless to say, its sauce, because the main ingredients usually are served raw or simply blanched before they are served with the sauce. Here I have included the recipe of this nice sauce to be eaten with ‘yong tau fu’ and sotong kangkung type of rojak. Follow the recipe exactly and you will not be disappointed!

Mix all these together:

1cm cube belacan (held to a flame but be careful not to burn it!)
3 Tbsp petis
1 Tbsp dark soy sauce
1 Tbsp sweet soy sauce
10-12 small extra hot chillies ( cili padi) pounded
1 Tbsp chili paste (or as much as u like)
7-8 Tbsp sugar
salt to taste
80-100ml warm water
and finally, 1-2 Tbsp pounded roasted peanuts and 1 Tbsp roasted sesame seeds, for sprinkling on top of rojak

The original ingredients for sotong kangkung (according to my recipe) would be:

300gm kangkung
1 sotong kembang (sliced)
1 cucumber (sliced)
½ pineapple sliced and cut into small portions
4-5 fried tofu (sliced)


Back to my little potluck gathering. My Pakistani friend brought chapatis and a special type of parathas with potatoes and coriander leaves in them and another friend brought a very delicious chicken dish which tasted very Thai. One friend brought some Kiwi fruit jelly that was nice and our cousin brought with them a box of sinfully delicious Krispy Kreme sugar doughnuts that gave all the kids a second dose of energy that night that they were 'performing and singing' (read: making a racket) for the adults in the kitchen long after some of them should already have been in bed and fast asleep.

This is why I like potluck and small gatherings. You get to talk to everyone and you get to taste all kinds of food. Needless to say, I had a wonderful time chatting with my friends and eating – two things that I like best in the whole world.

Monday, January 08, 2007

Snapshots

Made a little bit of nasi lemak and peach pudding for hari raya morning. Had three invitations that day so didn't bother to cook the usual raya menu.


And the next day, made this truly, truly wonderful Apricot and Peach Cobbler to bring to a friend's house for raya. (note: pic was changed from a previous one - this is a more recent try and I think this is what a cobbler should look like!)


Got this trifle from our lovely neighbours on Friday - they were returning my bowl for the pudding I made them for Eid.


Made this fish cake noodles on Saturday.


Gave the boys a haircut on Sunday.


Cooked tandoori chicken and some nasi minyak for my birthday dinner on Monday.

Sunday, December 10, 2006

Cherry Crumble

Made this today for an old friend who came to visit. Probably the easiest dessert I have made and it tastes great and looks great too. I substituted the oats with some mixed muesli cereal with the nuts and raisins included. Highly recommended!

Ingredients:
  • 55g butter
  • 3/4 cups all-purpose flour
  • 1/3 cup rolled oats
  • 1/4 cup packed brown sugar
  • 1/8 teaspoon salt
  • 400g cherry pie filling (or any other pie filling)

Method:

  1. Preheat oven to 190 degrees C.
  2. Melt butter or margarine in a large saucepan. Remove pan from heat; stir in oats, flour, brown sugar, and salt until a dry, crumbly dough forms. Press about 2/3 of the dough into the bottom of 8 inch pan, making a firm even layer.
  3. Spread cherry pie filling in the crust, and sprinkle with remaining crumb mixture.
  4. Bake for 40 to 45 minutes, until top is lightly browned. Serve warm or at room temperature with cool custard.

Monday, November 20, 2006

Black Bottom Cup Cakes

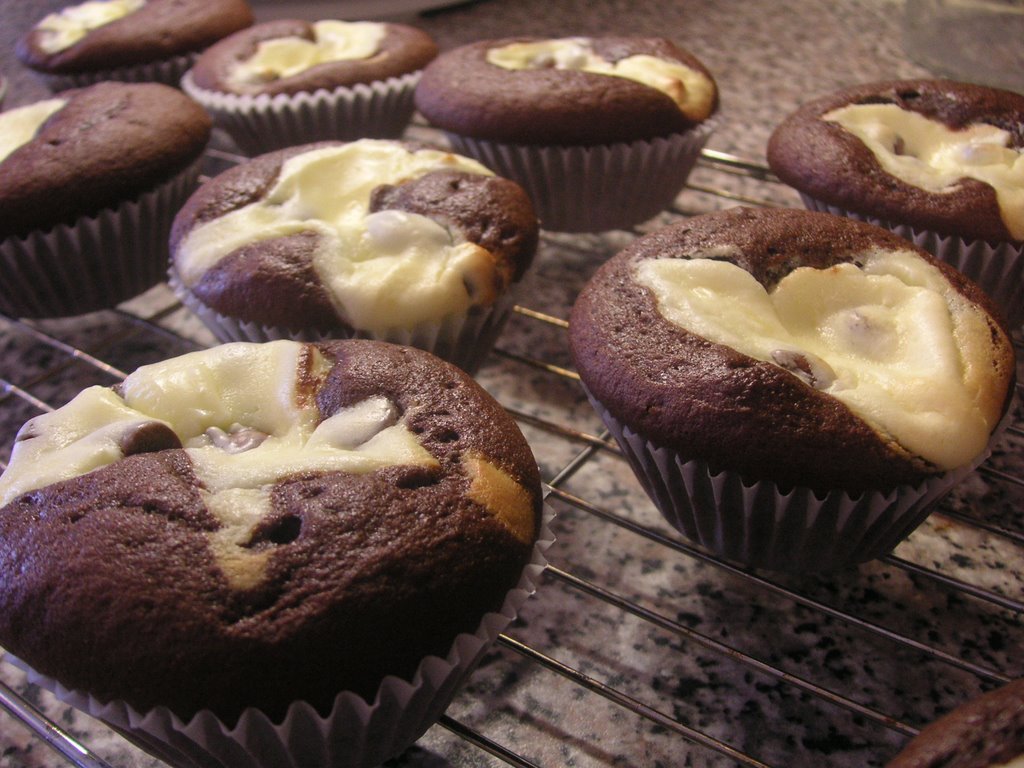
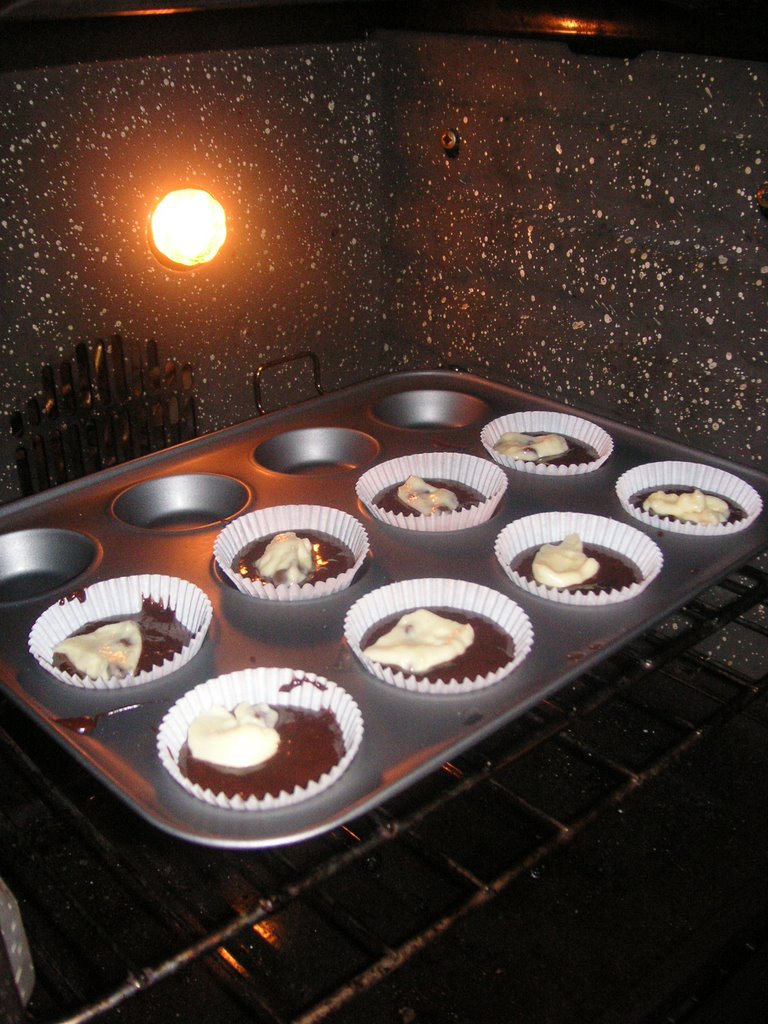
At 9.45am yesterday I decided that I wanted to give some cup cakes to some good friends who I intended to visit and we were running late because my eldest son had to go to a birthday party in the morning and we had to leave by 11 am. And therefore, I admit that I scrapped the cake part and used a cake mix instead which I had in my kitchen cabinet. It turned out very, very good, honestly. But next time I make this, I do really intend to try the real recipe below.

Ingredients:
  • 224g (8oz) cream cheese, softened
  • 1 egg
  • 1/3 cup white sugar
  • 1/8 teaspoon salt
  • 1 cup miniature semisweet chocolate chips
  • 1 1/2 cups all-purpose flour
  • 1 cup white sugar
  • 1/4 cup unsweetened cocoa powder
  • 1 teaspoon baking soda
  • 1/2 teaspoon salt
  • 1 cup water
  • 1/3 cup vegetable oil
  • 1 tablespoon vinegar
  • 1 teaspoon vanilla extract

Method:

  1. Preheat oven to 175 degrees C. Line muffin tins with paper cups.
  2. In a medium bowl, beat the cream cheese, egg, 1/3 cup sugar and 1/8 teaspoon salt until light and fluffy. Stir in the chocolate chips and set aside.
  3. In a large bowl, mix together the flour, 1 cup sugar, cocoa, baking soda and 1/2 teaspoon salt. Make a well in the center and add the water, oil, vinegar and vanilla. Stir together until well blended. Fill muffin tins 2/3 full with the batter and top with a dollop of the cream cheese mixture.
  4. Bake in preheated oven for 25 to 30 minutes.

Tuesday, October 31, 2006

The Syawal Event

Raya (Eid) has been tiring but good.

My menu for the first day of raya was the normal compulsory raya food: nasi himpit, pulut, rendang, kuah kacang and kuah kelia. No surprises there. But my husband wanted one dish that is different, so, as recently I made Wantan Mee (however is the correct spelling) for iftar and we thought it was quite good; we decided that it was good enough to serve for raya.

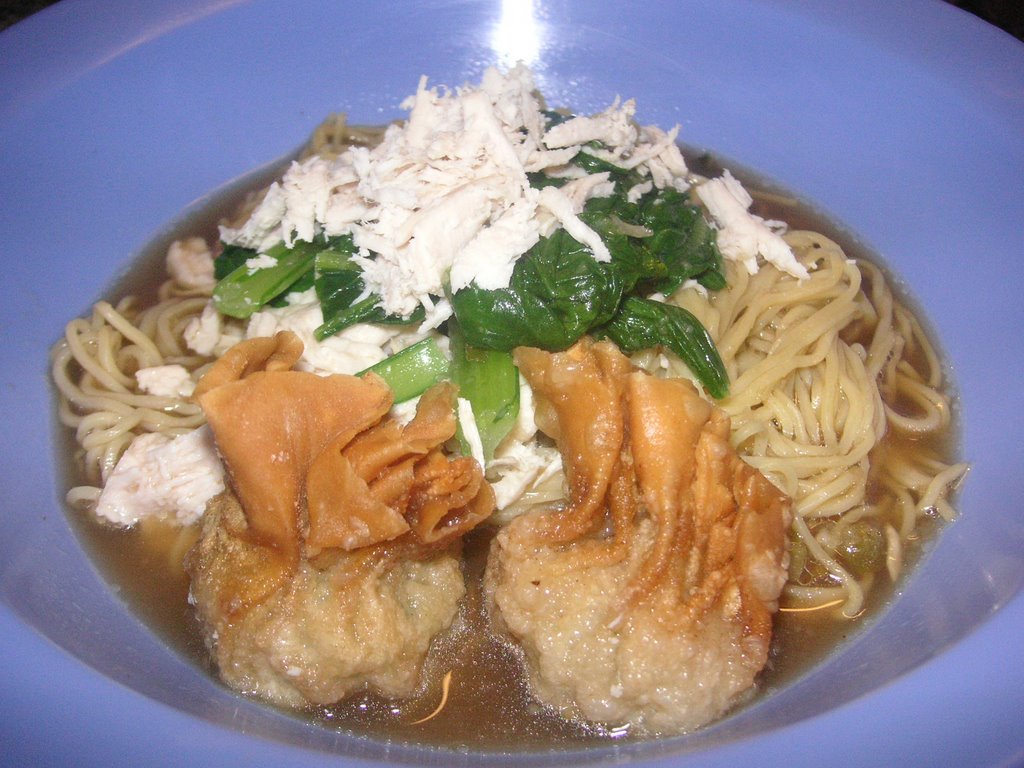
I wanted to make my own wantans but my husband was kind enough to dig deeper into his not so deep pockets to buy some frozen seafood ones for me (Made in Malaysia and complete with the Jakim ‘Halal’ sign, pic below) in a nearby Chinese supermarket which we recently discovered. So I did not need to prepare the wantan fillings that raya morning nor was I forced to roll the wantan skins and shape them into something becoming and appetizing, for all I had to do was take the big box of frozen wantans out of the fridge, thaw them for awhile and deep fry them, to be eaten hot with the noodles in hot wantan soup, along with cooked vege (sawi) and some shredded chicken – all of which was very, very easy indeed to prepare.

I will definitely do a repeat performance of this dish sometime in the future because of its simplicity and taste. Fortunately for us, our guests loved them too, at the very least because it was a little different.

For dessert, I made a batch of cream puffs, dark cherry cheesecake, peach pudding and some fresh cinnamon rolls. I know, I know. I overdid it a little but we were expecting quite a few people and I added the peach pudding at the last minute, plus, we intended to give away some of the food anyway. Saying that, the cream puffs (just the shell – still not filled with the cream filling) ended up in a large container in my kitchen cabinet because my table was already overflowing with plates of food – I ended up giving the puffs away later (with the filling, of course) and slices of this and that later to a few friends who mentioned that they loved my desserts. That was the initial intention anyway.

Therefore, I am pleased to announce that nothing much was wasted, except perhaps for the final piece of pulut and last piece of roll which I discovered last night, already mouldy in my cake container. I’m not sure about the food that I gave away though, my friends may in turn throw them away in their bins because there were obviously so much food in everyone’s house during raya – I can’t say I am surprised if that happened, although I would have to say that it would be a real waste indeed because the food I prepared was bloody damn good, people!

Permit me to say so myself since my dear readers could not taste my raya fare and therefore will have to depend on my esteemed judgement about the matter.

He he he he.

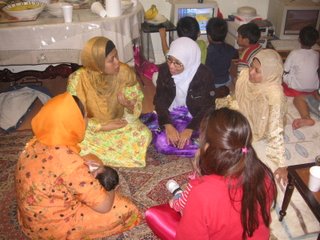
With all that food I prepared, I actually had breakfast on Hari Raya morning at the neighbours’. My Bangladeshi neighbours invited us to come first thing in the morning because the husband of the house had some things to do at his uni (he is a PhD student, you see,) so he asked us to visit early in the morning. And my husband agreed to go there at 9, BEFORE I finished my own chores at home. After tasting each one of the delicious delicacies they served me on the floor of their kitchen, I rushed back home, just only remembering that I have left my bread dough for too long and unfortunately when I reached home, I found that it has tripled in size. The dough has not been very cooperative from the start so why would it cooperate with me at that point, I had thought. Needless to say, I forced it into submission and it turned into the cinnamon roll I wanted anyway.

Our guests only started coming in the afternoon and then they didn’t stop coming until it was time for the Maghrib prayers, albeit one family at a time (luckily for me), except for a friend who brought 3 other families with him, that is. After that, it was time for us to visit our friends. In truth, I was too tired to go out but it was RAYA after all and we had to visit other people too or else it wouldn’t be raya now, would it?

We ended up coming home after midnight that night. My youngest was already nodding off in the car, my poor baby had to sleep in his baju raya that night because we didn’t want to disturb his sleep, plus I would be lying if I didn’t say I was too tired to change him anyway.

All in all it was a pretty festive and cheery raya. I'm sorry that I can't elaborate any more at the moment because really, even thinking of Raya makes me feel tired, so, all that I can say is; here's hoping that you also had a wonderful raya like I did.