Showing posts with label For The Tastebuds. Show all posts

Tuesday, October 17, 2006

Bread and Butter Pudding

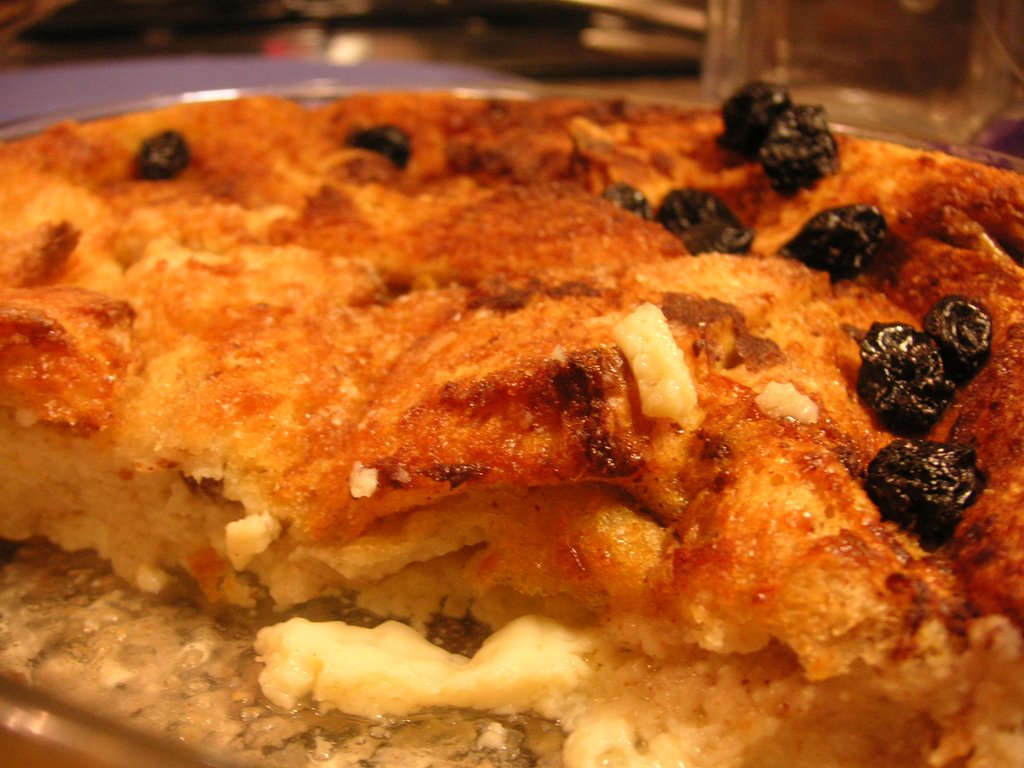
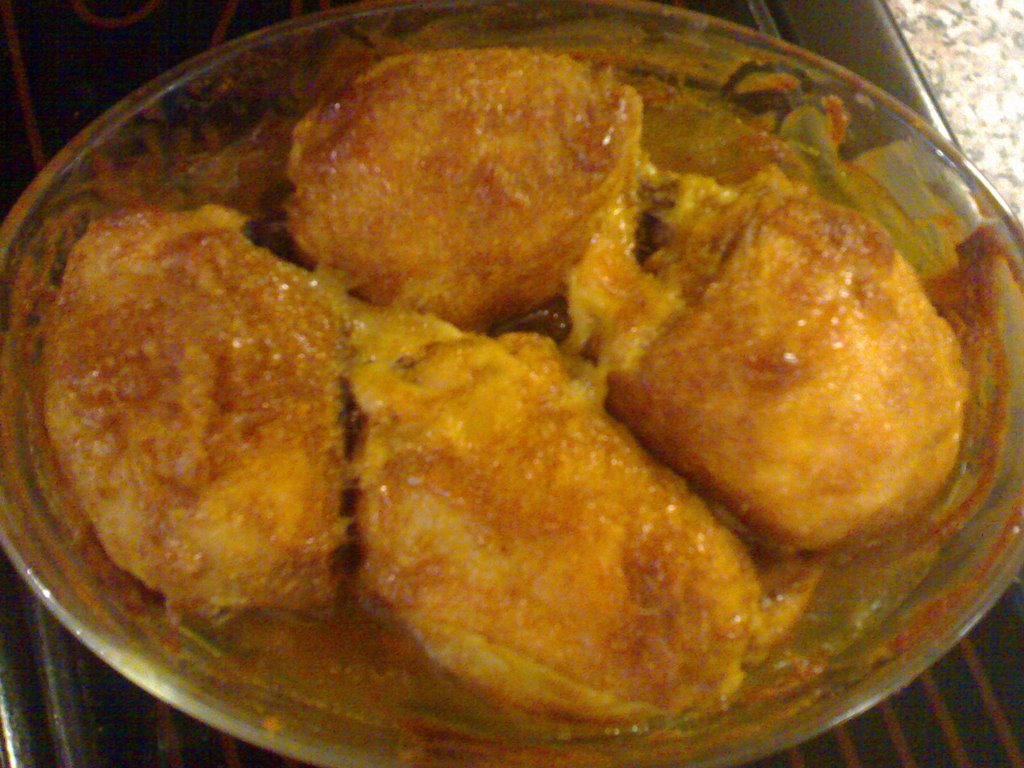
Made this bread and butter pudding for my husband and a friend a few days ago. Just thought I would share it since it turned out quite nice. I had to divide the recipe into two portions because I couldn't fit it into my 8" baking tin. Used my oval serving bowl instead.

Best served hot with delicious cold custard.

Here's the recipe:

INGREDIENTS:
6 slices day-old bread
2 tablespoons butter, melted
1/2 cup raisins
4 eggs, beaten
2 cups milk
3/4 cup white sugar
1 teaspoon ground cinnamon
1 teaspoon vanilla extract

METHOD:
Preheat oven to 175 degrees C.
Cut bread into triangles and arrange in an 8 inch square baking pan. Drizzle melted butter or margarine over bread. Sprinkle with raisins, lifting the slices here and there to get some of it inside.
In a medium mixing bowl, combine eggs, milk, sugar, cinnamon, and vanilla. Beat until well mixed. Pour over bread, and lightly push down with a fork until bread is covered and soaking up the egg mixture.
Bake in the preheated oven for 45 minutes, or until the top springs back when lightly tapped.


Very easy and tastes good too. Try it!

Wednesday, October 11, 2006

Serimuka

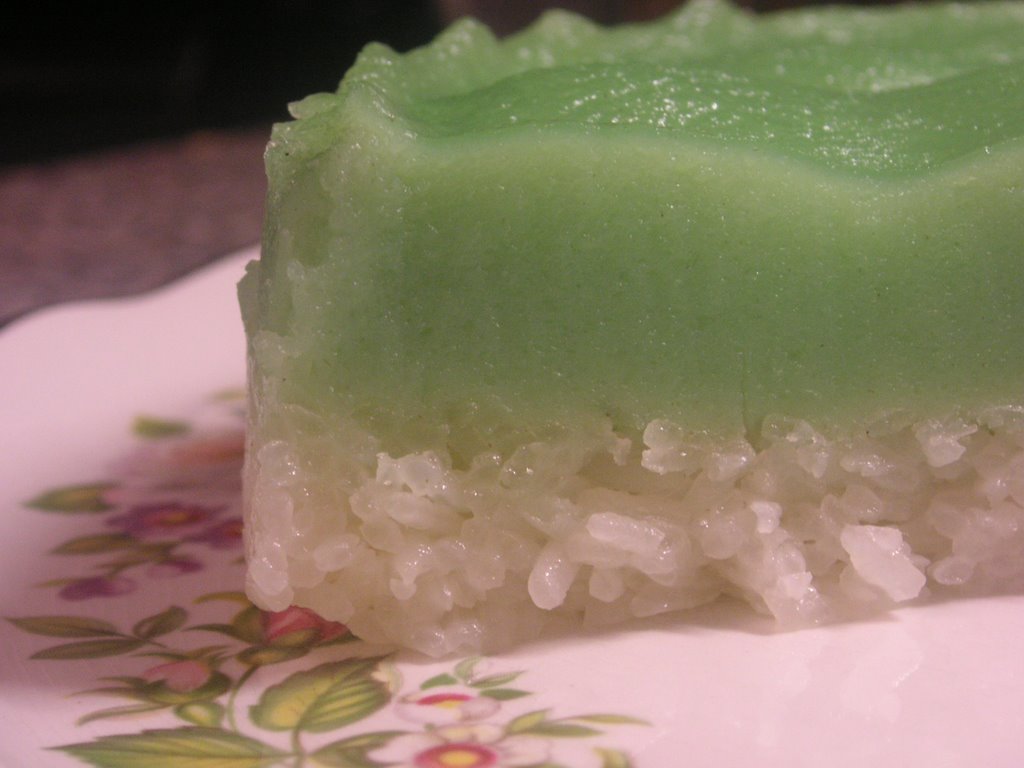
I craved for this traditional Malay delicacy and decided to try and make some for iftar a few days ago. Got this recipe from a friend (thank you!) and decided to try it even though I had no pandan leaves nor a reliable steamer in my kitchen.

And so here's the recipe:

Ingredients:
For bottom layer;

1 cup glutinous rice, some coconut milk, salt to taste

For top layer;

1 cup coconut milk

1 cup of eggs (4-5 eggs depending on size)

3/4 to 1 cup of sugar

2-3 leaves pandan (screwpine) leaves, blended with a little water and sieved to get the coloured and fragrant essence

3 Tbs plain flour


Method:

Wash rice and leave submerged in clean water for 2-3 hours. Line a loose bottom cake tin (8")with some aluminium foil. Drain rice and pour into cake tin and spread evenly. Add some salt to the coconut milk and pour into the pan - just up to the level of the rice. Steam for 15 to 20 minutes.

Wrap your hand with a towel (because the rice is hot!) before inserting hand into a clean sandwhich bag/ plastic bag. Press hard with palm on the glutinous rice, all around the pan until rice is flat and level. Drizzle a little plain flour on top of surface and spread evenly with hand (still wrapped in bag).

Mix all ingredients for the top layer and sieve twice to get a smooth and thick mixture. Heat briefly on a low fire just until you can see a little steam coming from it and the mixture gets thicker, stirring constantly.

Pour mixture onto cooked and flattened rice. Steam for 30-45 minutes. Cool before cutting and serving.


It turned out nice – although a little too soft at the top and slightly eggy (because I had no pandan but even after I used lots of vanilla essence to try and lessen the egg taste). I may tweak the recipe next time with some custard powder instead of plain flour and some evaporated milk included in the coconut milk measurement – want to try to increase its creaminess and perhaps harden it just a little bit. Do u think that will work? Please do contact me if you have a better recipe for me to try.

Saturday, September 30, 2006

Ramadan Get-Together

My husband and I are quite determined not to break our fast alone during the weekends of Ramadan. It all started when on the first day of Ramadan, which was on a Saturday last weekend, when we had our iftar (breaking fast as dusk) at a friend's place in Slough after they kindly gave us some complimentary tickets to go to Legoland. We spent the day with them at Legoland and later they invited us for iftar at their place which we accepted (after much persuasion on my husband's part) and my husband and I have decided that it is indeed lovely to spend time with friends and eat in a group with lively conversation as opposed to our normal routine of eating alone, just the two of us in our kitchen back in London, with one ear always alert, listening to the children playing in the living area.

And so we decided at the last minute yesterday to ask some friends to come over for iftar today at our place. Oh, I could never cook so much food in such short notice and with very little planning so we decided that it would be potluck - 'just bring whatever you're having for berbuka at home' because really, it was just an excuse for us to meet up with our close friends.

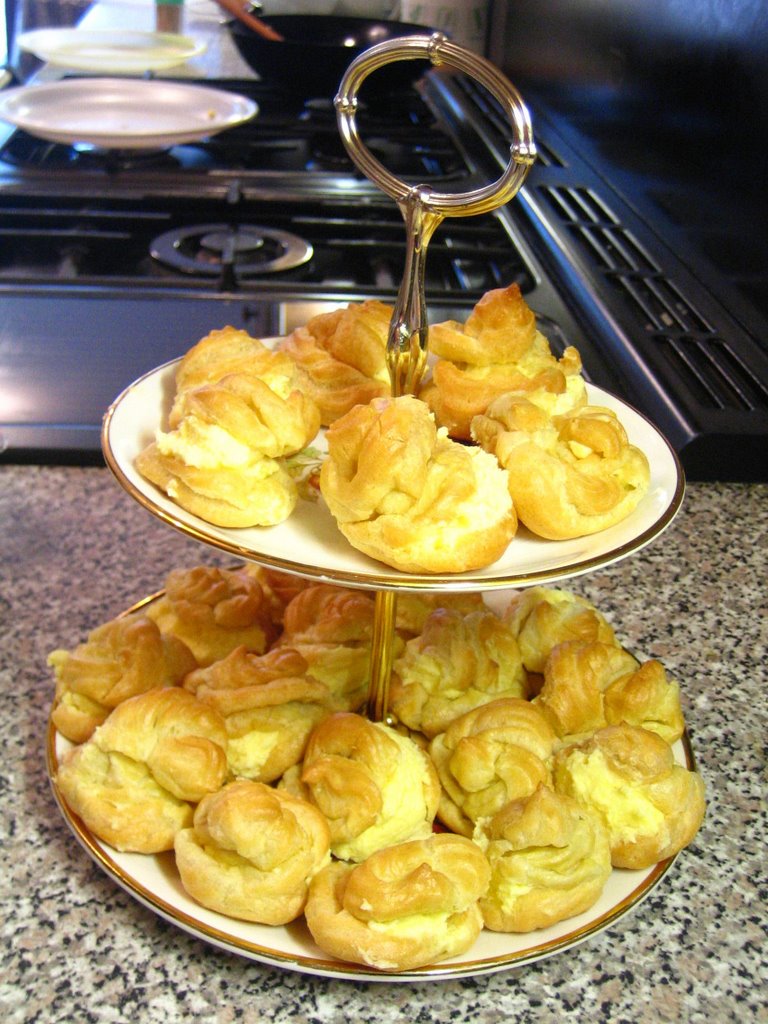
My menu was my Chicken Milano, those scrumptious Cinnamon Rolls which I baked just 30 minutes before the first guest arrival and some cream puffs, which was a first attempt for me. My friends' menus were more elaborate and traditional. They brought nasi putih, a delightful and delicious Pais Ikan Seabass, Mee Rebus, Popia, Roti Paratha, Kari Arab, Paceri Nenas, Chocolate Cake, Sweet and Sour Fish and Masak Lemak Kobis. As usual, I was huffing and puffing in the kitchen until the first guests have already arrived and their food already on my table and I had to rush upstairs to put on something more presentable not before almost all the guests have seen me with my worn and stained apron and slipping track bottoms and not to mentioned my not-so-gorgeous state of hair. Sigh.

Nevertheless, it was overall a success.

I told you that pasta recipe was good - all my guests complimented me for that one and all my other presentations except for the cinnamon rolls - which I baked in 2 batches - were gone by the time everyone decided to go home. Indeed, after all those compliments and happy smiles and full bellies, what housewife wouldn't be happy and satisfied?

I have included the Cream Puff recipe that I used for my first attempt at choux pastry - I think cream puffs are easy to make as long as you remember to poke a hole in each puff as soon as it is done and leave it in the oven for a few minutes with the oven door a little ajar - for the purpose of 'drying' the inside of the puffs. I piped the puff mixture onto the baking tray using a pastry bag and put the cream in by slitting the puff at the side with a knife and using a teaspoon to put the cream in. The result was more than acceptable, I think.


Cream Puffs

INGREDIENTS:
2 (196g) packages instant vanilla/white choclate pudding mix
2 cups heavy cream
1 cup milk (or a little less)

1/2 cup butter
1 cup water
1/4 teaspoon salt
1 cup all-purpose flour
4 eggs

DIRECTIONS:
Mix together vanilla instant pudding mix, cream and milk. Cover and refrigerate to set.
Preheat oven to 425 degrees F (220 degrees C).
In a large pot, bring water and butter to a rolling boil. Stir in flour and salt until the mixture forms a ball. Transfer the dough to a large mixing bowl. Using a wooden spoon or stand mixer, beat in the eggs one at a time, mixing well after each. Drop by tablespoonfuls onto an ungreased baking sheet.
Bake for 20 to 25 minutes in the preheated oven, until golden brown. Poke a small hole in each and leave the oven door a little ajar for a few minutes before taking them out. Centers should be dry.
When the shells are cool, either split and fill them with the pudding mixture, or use a pastry bag to pipe the pudding into the shells.
(If you want recipes for other fillings for the cream puff, you can go to my friend's recipe blog and also this blog.)

This is food to impress, especially if you drizzle some melted chocolate or icing sugar on top of the puffs for a nice last touch before serving. Try this one out with your friends. You can pipe them just like I did to make cream puffs (profiteroles) or you can pipe them in long strips to make chocolate eclairs and tantalize the children. Good luck.

Thursday, September 28, 2006

Cinnamon Rolls!

I have always been a little intimidated by bread recipes. It is because of the kneading. All that pressing and punching and pinching and rolling and if the bread turns out flat and hard - all those beads of sweat for nothing. That was why I have kept this recipe for a long time and in fact have bought the cinnamon powder ages ago with the intention to make these but have yet to even open the packaging to smell the lovely cinnamon aroma to tempt me into making the rolls.

But somehow, in this holy fasting month, I felt the urge to give it a go, but even then, I was too afraid to face the punching and pressing and rolling alone, so I asked my idle housemate, Kuzco, a Malaysian living in one of our rooms who has nothing to do all day except to look at the pc and apply for jobs, to help me with it. It turned out that he also misses his Cinnabon from the concourse floor at KLCC and so he gladly agreed to help me.

This is my first try at making any sort of real bread and I thank God that it turned out B.E.A.U.T.I.F.U.L.L.Y. (with Kuzco's help at the kneading and measuring - rest assured that you have redeemed yourself, Kuzco, from your mistake of not adding that bit of warm water in the recipe - and letting me proceed to punch holes into the dough when there is 1 ingredient lacking!). And so, I would like to recommend this recipe to anyone out there who is living anywhere where there is no St Cinnamon or Cinnabon - we are in the same boat, my friends! - this recipe is easy and the result is wonderful, even for a first timer like me.

Therefore, I am confident that YOU can do it too.


INGREDIENTS:
1/4 cup warm water
1/4 cup butter, melted
1/2 (47g) package instant vanilla pudding mix
1 cup warm milk
1 egg, room temperature
1 tablespoon white sugar
1/2 teaspoon salt
4 cups bread flour
1 (7g) package active dry yeast

1/4 cup butter, softened
1 cup brown sugar
4 teaspoons ground cinnamon
3/4 cup chopped pecans/ raisins

1/2 (8 ounce) package cream cheese, softened
1/4 cup butter, softened
1 cup confectioners' sugar
1/2 teaspoon vanilla extract
1 1/2 teaspoons milk

DIRECTIONS:
In a large bowl, combine water, melted butter, vanilla pudding, warm milk, egg, 1 tablespoon sugar, salt, bread flour and yeast. Mix together and knead for 8-10 minutes and leave covered in a warm place for 1 hour.

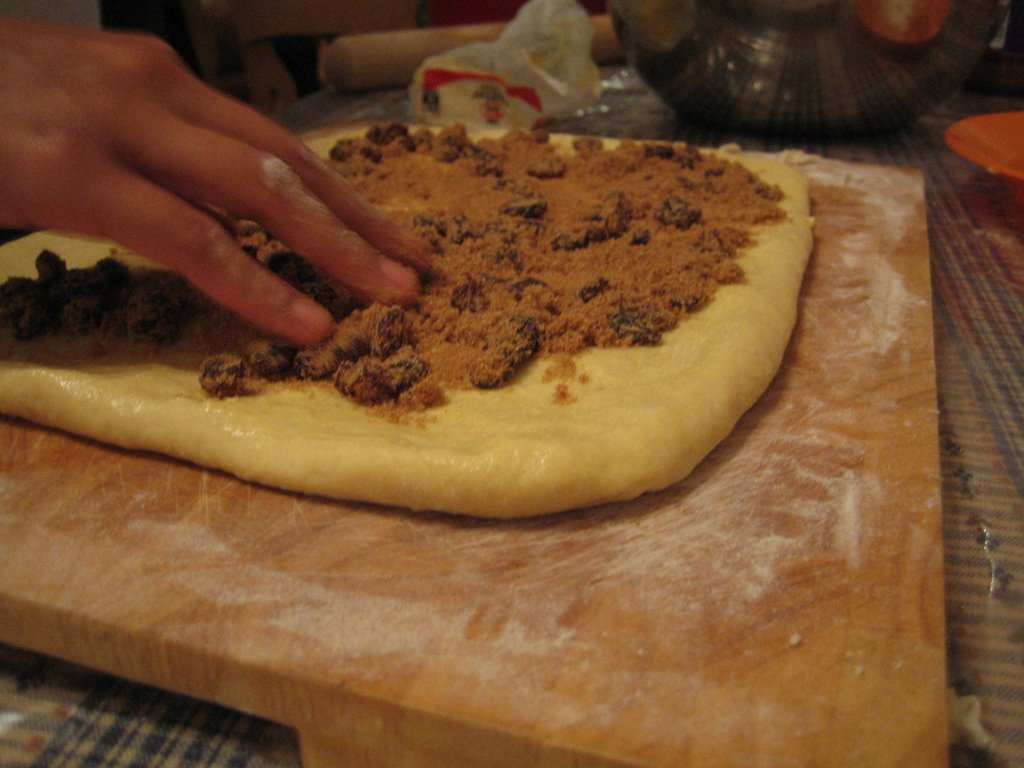
After 1 hour, the size of the dough will have doubled. Turn dough out onto a lightly floured surface and roll into a 17x10 inch rectangle. Spread with softened butter. In a small bowl, stir together brown sugar, cinnamon and pecans. Sprinkle brown sugar mixture over dough.
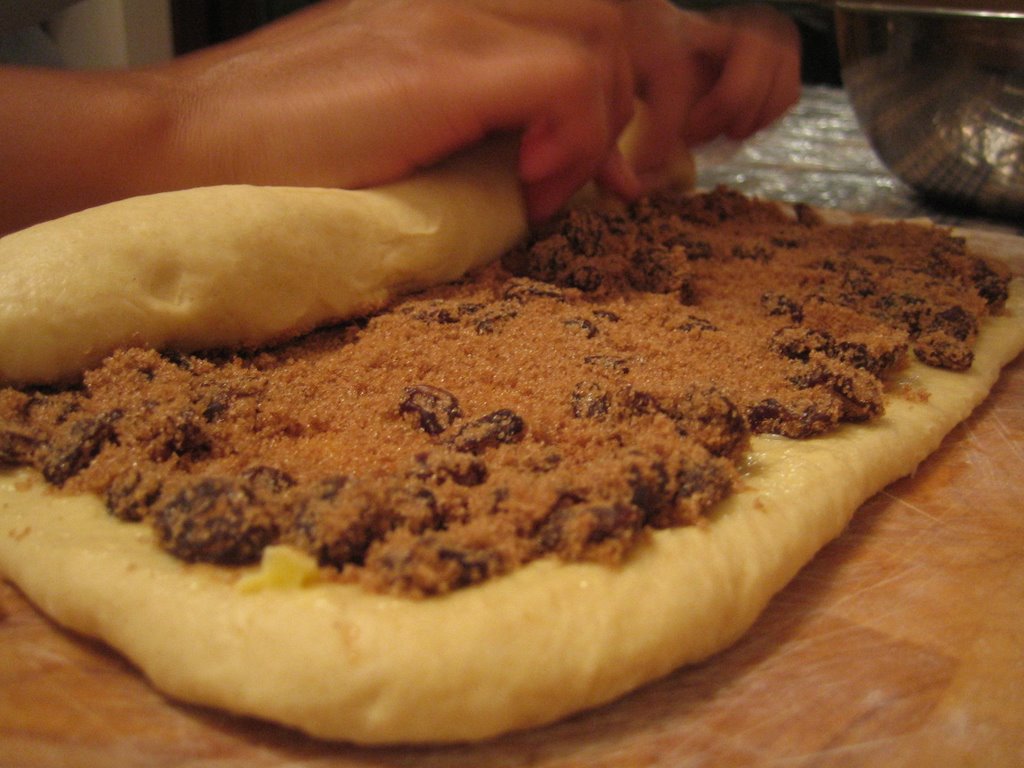
Roll up dough, beginning with long side. Slice into 16 one inch slices and place in 9x13 buttered pan - but I used a normal 9" round cake tin. Let rise in a warm place for about 15 minutes. Meanwhile, preheat oven to 350 degrees F (175 degrees C).

Bake in preheated oven for 15 to 20 minutes. While rolls bake, stir together cream cheese, softened butter, confectioners' sugar, vanilla and milk. Remove rolls from oven and top with frosting. (I did not prepare the topping because I was confident that the rolls will not turn out nice so why bother. So I missed out on tasting these wonderful rolls with their topping. Next time, I will definitely make the topping.)

Some pics:


Tuesday, September 26, 2006

Chicken Milano

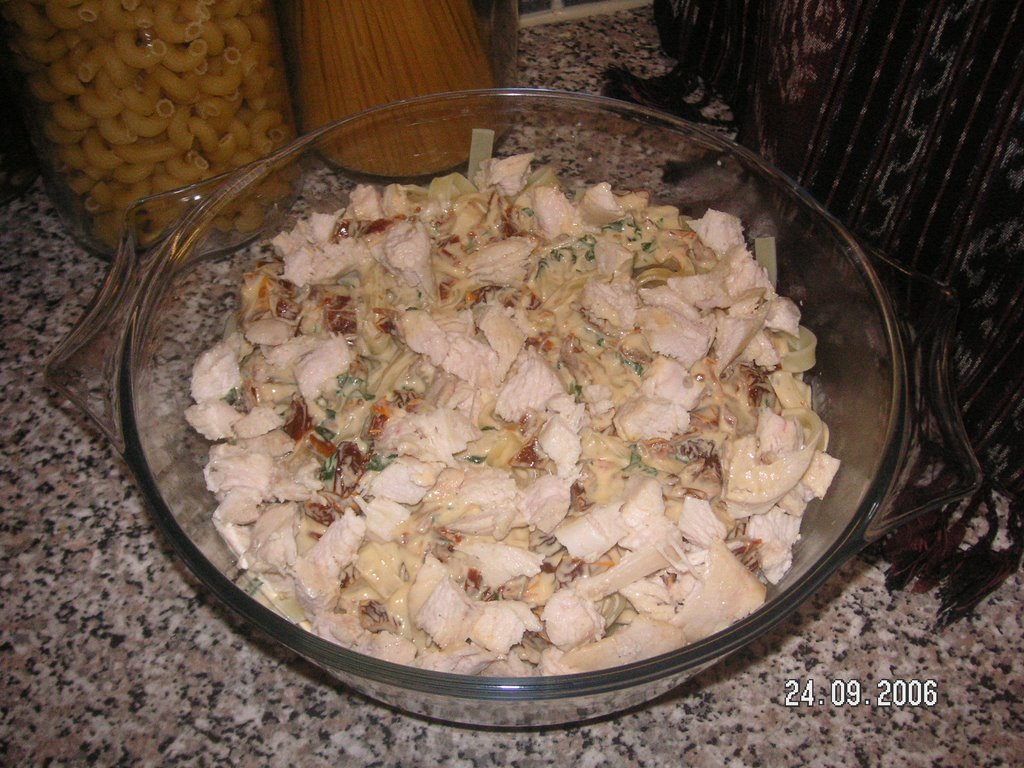
Have you ever tried cooking with sundried tomatoes? They are absolutely wonderful and I recommend this delicious recipe to anyone who would like to try a sundried tomato and pasta dish. If you have a lovely recipe with sundried tomatoes as one of the ingredients, please do share it with me because I love them!

Please don't judge this recipe from this picture though - I was too tired to take a better one, perhaps on a dish that would have clearly shown the swirly pasta and the tomatoes and basil. This pic will have to do, for now.


INGREDIENTS:
1 tablespoon butter
2 cloves garlic, minced
1/2 cup sun-dried tomatoes, chopped (use the dry ones, not the ones in oil)
1 cup chicken broth, divided
1 cup heavy cream
300 gm skinless, boneless chicken breast halves
salt and pepper to taste
2 tablespoons vegetable oil
2 tablespoons chopped fresh basil
225 gm dry fettuccini pasta

DIRECTIONS:
Sprinkle the chicken with salt and pepper on both sides. In a large skillet over medium heat, warm oil and saute chicken. Press on chicken occasionally with a slotted spatula. Cook for about 4 minutes per side or until the meat feels springy and is no longer pink inside. Transfer to a board; cover and keep warm. Discard the fat from the skillet.


In a large saucepan over low heat, melt butter; add garlic and cook for 30 seconds. Add the tomatoes and 3/4 cup of the chicken broth; increase to medium heat and bring to a boil. Reduce heat and simmer, uncovered, for about 10 minutes or until the tomatoes are tender. Add the cream and bring to a boil; stirring. Simmer over medium heat until the sauce is thick enough to coat the back of a spoon.

In the same skillet used for the chicken, over medium heat, bring 1/4 cup chicken broth to a boil; stirring the pan juices. Reduce slightly and add to the cream sauce; stir in basil and adjust seasonings to taste.

Meanwhile, bring a large pot of lightly salted water to a boil. Add fettuccine and cook for 8 to 10 minutes or according to instructions on package; drain, transfer to a bowl and toss with 3 to 4 tablespoons of the sauce.

Cut each chicken breast into small pieces. Transfer the pasta to serving plates; top with chicken and coat with the cream sauce; serve.

Thursday, September 07, 2006

Tried and Tasted - Banofee Pie

Tried this Banofee Pie recipe from a friend's blog.


My own humble adjustments to the recipe;

For a 9" pie dish, use 300g digestive biscuits, more bananas, not sliced too thin, layered overlapping each other a little (therefore requiring more slices - which is my intention!)

And for the toffee - use a big can. And once boiled for 3 hours, should be used as soon as possible for it to be more manageable. If you decide to use it later, make sure you soften the toffee before you open up the can by boiling the can again for at least 40 mins. And the cream - definitely should be more than what I used on my pie - I used only around 1 cup of whipping cream for that amount in the pic.

Overall, very easy, nice and will definitely try again.

Saturday, August 26, 2006

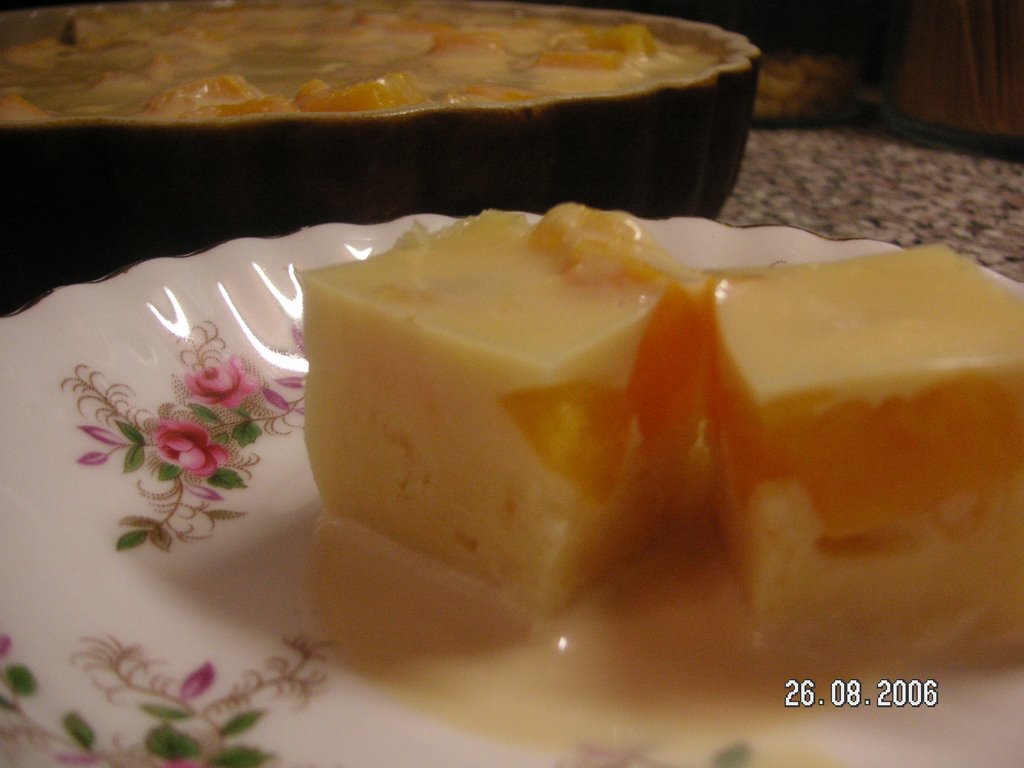
Peach Pudding

Tried this recipe from memory today - somebody gave me this recipe or something similar to it years ago but I seem to have lost it - and the result was (thank goodness) yummy!!

Simple and lovely. Try it!

Best eaten with some light cream or evaporated milk.

Ingredients:
1 pack agar-agar (20g)
3 1/4 cups of water
2 small cans of evaporated milk (170g each)
2 Tbsp custard powder, mixed with a little cold water
1 1/2 cups of sugar
1 loaf butter/ madeira cake
1 can peaches, drained, diced, syrup set aside

Method:
Cook the agar-agar strips in water until strips dissolve completely. Reduce heat. Add sugar and evaporated milk and stir. Pour in the custard mixture. Stir and mix well. Leave on reduced heat for a while, stirring occassionally until mixture reaches boiling point just for a few seconds. Set aside.

Line bowl with cake slices/ cubes and drizzle with the syrup from canned peaches. Arrange a layer of peaches on cake and pour agar-agar mixture to fill the bowl. Refrigerate.

Tip: If you can't find a 20g pack agar-agar and don't know how to measure the water, go by this rule of thumb: 1 cup (full and packed with) agar-agar strips requires 3 cups of water. Obviously, you need to adjust the rest of the ingredients as well. For agar-agar to be nice and sweet, the sugar must be a little excessive (too sweet) before the agar-agar sets - once set, the agar-agar will be 'just nice' - hopefully!

Friday, August 18, 2006

Nice and Easy Brownies

Tried this recipe yesterday - was looking for a non cakey type of brownies recipe. This one tastes nice - very, very easy to make and mine was ready in the oven after 20 minutes (make sure never to overcook your brownies!) Nice and not too cakey - but still not the kind I'm looking for. Anybody out there with a good non cakey brownie recipe, feel free to contact me!


Ingredients:
1/2 cup butter, melted
1 cup white sugar
2
eggs
1/2 cup all purpose flour
1/3 cup unsweetened cocoa powder
1/4 teaspoon
salt
1 teaspoon vanilla extract
1/2 cup chopped walnuts (optional)

Method:
Preheat oven to 350 degrees F (175 degrees C). Grease and flour an 8x8 or 9x9 inch
baking pan. In a medium bowl, beat together the butter and sugar. Add eggs, and mix well. Combine the flour, cocoa and salt; stir into the sugar mixture. Mix in the vanilla and stir in walnuts if desired. Spread evenly into the prepared pan. Bake for 25 to 30 minutes in the preheated oven, or until edges are firm. Cool before cutting into squares.

Monday, August 07, 2006

Sweet Red Chicken

(Ayam masak merah)

As usual, my recipes are really for people like me who are living overseas and want a taste of home using whatever ingredients that are available here. Enjoy cooking!


A. 4 pieces of chicken, with skin
Some turmeric powder
Salt to taste

B. 1 bombay onion
2-3 cloves garlic

Basic Malay aromatic spices:
1”-2” cinnamon stick
2-3 cloves
1 star anise
2-3 cardamon seeds

1.5 tsp chilli powder or more if preferred
1.5 ” ginger, sliced into strips
3 - 4 tsp tomato puree
2 Tbs tomato ketchup
3-4 tbs fresh milk
½ Bombay onion sliced into strips
¼ cup frozen peas
Oil for frying
Pinch of sugar - optional

Mix ingredients A together and fry in hot oil until chicken is cooked and crispy on the outside – but not too hard to bite into. Set aside. Blend (in a blender) ingredients B. Fry the spices in hot oil for 1-2 minutes and pour in the blended mixture, ginger strips and chilli powder - cook for 8 - 10 minutes or until mixture turns into a darker colour. Stir occasionally. Add tomato puree, milk, tomato ketchup and stir. If mixture looks a little dry – add a few tbs oil used to fry the chicken. Add the fried chicken together with the onion strips. Stir. Add the peas once the onions are cooked/ 2-3 minutes later. Add salt and sugar. Leave for a while (5 mins), on very low heat before removing.

Wednesday, July 19, 2006

Yummy Banana Muffins

Today, a 'Fun Day' was organised at my son's school. The teachers asked for the parents' or specifically the mothers' help in donating home made food for them to sell at the event to make money for the school. I found this recipe at my favourite website and decided to try it. It turned out quite good and my sons loved it!

Here's the recipe for anyone who would like to make these. They are soft and taste nice and most importantly, very easy to make. I added the chocolate chips for an 'extra treat' for the children and used paper cups so that I didn't have to do any greasing. In my fan assisted oven, it took only 18 mins.


INGREDIENTS:
2 cups all-purpose flour
1 cup white sugar
1 cup mashed ripe banana (3 bananas)
1/2 cup margarine
2 eggs

6 tablespoons milk
2 1/2 teaspoons baking
powder
1/2 teaspoon baking soda
1 teaspoon ground cinnamon
1/2 teaspoon salt

DIRECTIONS:
In a medium bowl mix flour, baking powder, baking soda, salt, and cinnamon and set aside. In a separate bowl cream margarine and sugar, add eggs and mix until smooth. Stir in milk and mashed banana and mix well. Fold in flour mixture into the liquid ingredients until combined.
Fill greased muffin
tins two-thirds of the way full. Bake in a preheated 350 degree F (175 degrees C) oven for 25 to 30 minutes.

Thursday, July 13, 2006

Strawberry White Chocolate Tiramisu

The 'summer tiramisu' recipe, as promised:

Ingredients:
12 ounces white chocolate
1 1/2 cups whipping cream, divided
3-ounce package cream cheese or mascarpone, softened
36 ladyfingers
1 1/4 cups cooled espresso or strong coffee
2 pints fresh strawberries, washed, stems removed and sliced

Method:
Melt the chocolate with 1/4 cup of the whipping cream in the top of a double boiler over hot, not boiling, water. Stir until smooth; cool to room temperature.
In mixing bowl, beat cream cheese or mascarpone until fluffy. Stir in the cooled melted chocolate. Whip remaining 1 1/4 cups whipping cream until stiff peaks form. Gently fold (see note) the whipped cream into the cream cheese-chocolate mixture; set aside.
Dip the ladyfingers in coffee (better to pour the coffee in a saucer) and line the sides of a 9-by-3-inch springform pan with ladyfinger halves, cut sides in. Arrange half the remaining ladyfingers on bottom of the pan. Cover with half the filling. Cover filling with half of the sliced strawberries. Repeat layers, ending with strawberries. Refrigerate at least four hours or overnight.

Note: To fold, place the heavier mixture over the light mixture. Starting at the back of the bowl, cut vertically through the mixtures and across the bottom of the bowl. This method gently combines the mixtures.

Monday, July 03, 2006

Tried and Tested

Ah, yes.

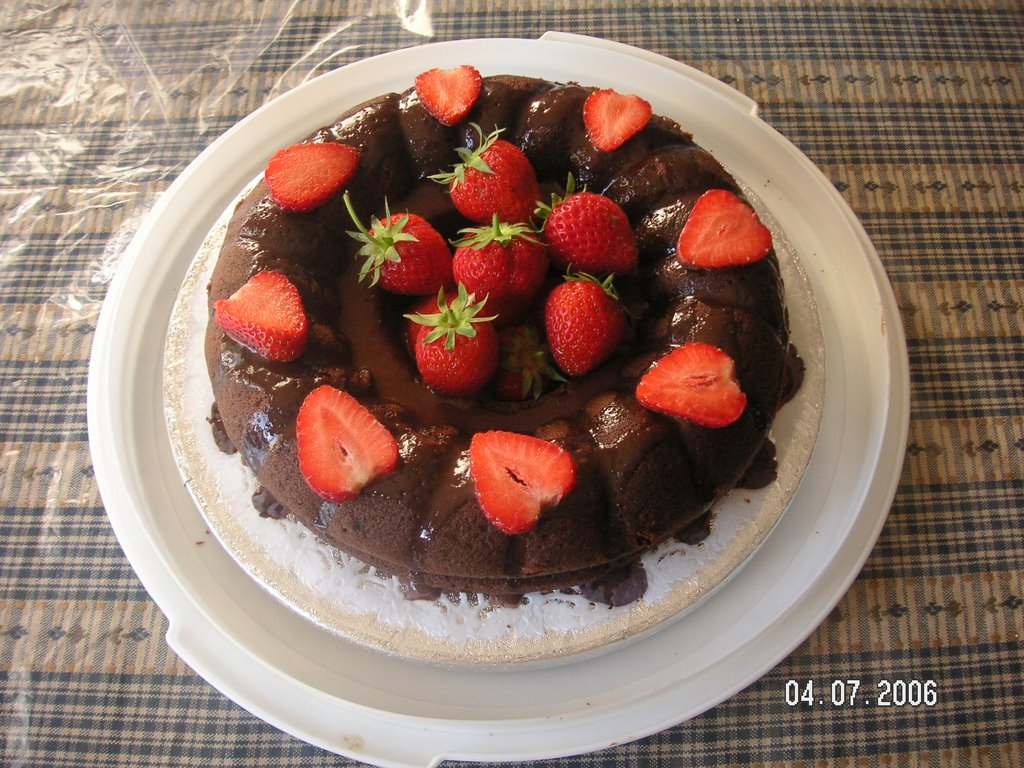
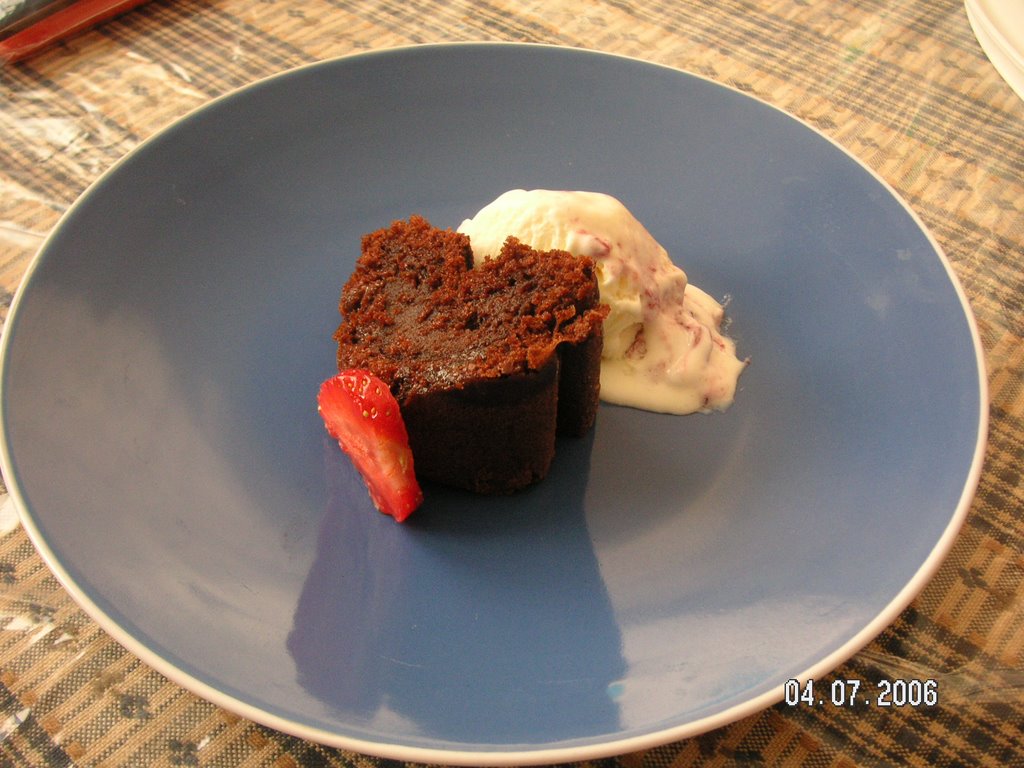
I’m happy to report that I was successful in baking the cake aforementioned in my recent entry and the result was as in the pic, right.

For those of you who would like to try this cake – yes, I have been assured and reassured by the internet and a reader of my blog that the ingredient named ‘instant chocolate pudding mix’ is indeed the one that I thought it was and the product can easily be found in any of the large supermarkets.


If you’re concerned that the cake looks a little small and thin in the picture, rest assured, it’s size should be fine if you use a 10 inch bundt pan as suggested in the recipe. As you can see from the pic, left, my bundt pan is a classic affair, something that may look nice as a decorative item in one’s kitchen (perhaps a kitchen with a large hearth where one can roast a deer and armoured knights are awaiting for their meal) but it is a shallow mould, really more suitable for a fruit cake or jelly and moreover, it’s 9 inches in diameter only. For reasons unknown even to myself, however, I just had to use it for this cake and baked the rest of the batter (about 1/3 of it left) in a normal, round 9” baking pan.

The texture of the cake was good – soft and very moist and a tad spongy, and it tasted good too. It was recommended in the recipe that the cake be eaten warm (20 secs in the microwave) with some vanila ice-cream but I have to say I somewhat disagree. Vanila is good, but raspberry flavour would be even better!

Be warned however, I did not follow the recipe word by word, so results may vary. First of all, I used a chocolate fudge cake mix instead of the devil’s food cake mix – Asda and Tesco decided they didn’t want to have anything to do with the ‘devil’ (anymore) although I’m quite certain that I have seen the product before on the top shelf in Asda's flour section. Unfortunately, the cake mix I bought was 110g less than what the recipe required but I emptied the packet into my large bowl anyway, and did not add any plain flour or cocoa powder to make up for it. And I used 4 eggs instead of 5, vanila essence instead of almond and a little less than 1 cup of chocolate chips - whatever was in my refrigerator, really! But the result, I think was still good.

So, there is a high probability that I will be making it again for that birthday party. But this time, using 2 round 9” baking tins, a proper chocolate frosting instead of that chocolate sauce I made and definitely, definitely with a little more care. Afterall, I don't want to have to blame my husband again for a spoiled dessert.

As for the presentation of the cake - my son wants a dinosaur cake (again), A T-Rex one this time, he said, so help me God.

Friday, June 30, 2006

Chocolate Cake - Testing!

My son's birthday is coming soon and we're planning a party for him on one of the weekends. I found this particular recipe in my favourite website and thought I'd try it for the party - I'm thinking of trying it first this weekend though, just to be safe.

The ingredients says '1 package instant chocolate pudding mix' - I haven't a clue what that is. Is there such a thing here in the UK? This is an American recipe so I hope someone who's familiar with it and knows the corresponding UK product/alternative for it will tell me what it is so that I can try this recipe without spoiling it. Anyone? Anyone? No one?

Right. I've made up my mind that if I do not find anything that's called 'instant chocolate pudding mix' at the supermarket, I'm going to assume that that thing is similar to something I found at Tesco's called 'Chocolate Flavour delight - just add milk and whisk' - I already have that at home. I'm actually convinced it's the same thing but I can't be 100% sure, of course. What do you think?


You don't know either?

No matter. I will be brave and try this recipe using that Tesco product this weekend.

Wish me luck, people.


Chocolate Lovers' Favorite Cake

Original recipe yield: 1 - 10 inch Bundt cake.
Prep Time: 30 Minutes
Cook Time: 1 Hour
Ready In: 2 Hours


INGREDIENTS:

1 (510g) package devil's food cake mix
1 (110g) package instant chocolate pudding mix
2 cups sour cream
1 cup melted butter
5 eggs
1/2 teaspoon almond extract
2 cups semisweet mini chocolate chips

DIRECTIONS:

Preheat oven to 350 degrees F (175 degrees C). Grease a 10 inch Bundt pan.

In a large bowl, stir together cake mix and pudding mix. Make a well in the center and pour in sour cream, melted butter, eggs and almond extract. Beat on low speed until blended. Scrape bowl, and beat 4 minutes on medium speed. Blend in chocolate chips. Pour batter into prepared pan.

Bake in preheated oven for 50 to 55 minutes. Let cool in pan for 10 minutes, then turn out onto a wire rack and cool completely.

Wednesday, June 07, 2006

Mayo Chicken

A quick one people, for it’s time for a recipe. This one is specially for a friend who informed me in an email that she wants to cook something different for her fussy little eater (you know who you are). It’s a chicken recipe – easy for all you busy people out there for the prep time is quick, it’s easy and it tastes good too. Straight to it:

Chicken pieces with skin – I normally use 4 pieces of chicken thighs but I’ve tried using 1 whole chicken as well and it works great.
Turmeric powder
Salt and pepper for seasoning
Curry powder
Mayonnaise

Rub the chicken all over with the turmeric powder, salt and curry powder. Arrange the chicken pieces in your baking tray or ovenware. Cover the chicken with some mayonnaise – just all around the surfaces, don’t bother to put any on the bottom of the chicken pieces because once the chicken is in the oven and coking, the melted mayo will cover those parts. Leave to marinate for 1 hour. Heat oven at 200 degrees – once oven is ready, cook chicken for 35 minutes. If you’re cooking 1 whole chicken, cook according to weight, 20-25 mins for each 500g plus an extra 20 mins for 1 chicken.

You don’t need to cover the chicken with foil if you’re just cooking the pieces. But if you’re cooking 1 whole chicken, it’s better to cover first and only take off the foil for the last 20 mins to make the skin crispy. Lastly, sprinkle some pepper on the chicken while it’s still hot.

Try it!

Monday, May 29, 2006

Spaghetti Meatballs!

A quick one today, while my children are watching TV. Due to the school mid term holidays, the eldest has been hogging the PC since this morning and was on it the whole of yesterday so I could not indulge in any bit of writing/ typing at all these few days, to my disappointment.

This is for a friend who asked for a meatball recipe. My family has gotten a little tired of spaghetti bolognaise and so I looked for an 'alternative' and found this recipe a few months ago and of course tweaked it a bit for my own taste buds and the result is, I think, good. My husband and I love it although my children will have none of it – they never want the meat in any spaghetti sauce anyway, be it mutton, beef, chicken or seafood in whatever forms; plain, mini balls, boxes and pyramids being the forms and shapes that I have painstakingly tried making. But the tomatoes in the sauce – they just love, and so to me it is still worth the effort to make any type of pasta with tomatoes in the sauce. But anyway, as I mentioned, my husband and I love it and so I’m sharing this with anyone who cares to try. It’s very simple. Here are the ingredients;

For meatballs:
250g minced meat
1 egg
1 slice of bread, shredded into small pieces (just by using your fingers)
salt to taste
garlic salt
1 tspn dried parsley
a sprinkle of black pepper
¼ tsp cumin seed, pounded (jintan putih)

A large jar of your favourite spaghetti sauce. (I use a 750g jar)
½ bombay onion
Salt to taste

Mix all meatball ingredients well and leave for a while in the fridge so that it will be easier for you to shape them into small size balls. Heat up your pot and add some olive oil to fry your onions for a bit before adding the sauce. Once it reaches boiling point, reduce the heat and let it simmer while you prepare the meatballs. In order to shape the meat into balls, take a handful of the meat mixture in your hand and squeeze so that the meat comes out in between your thumb and forefinger. Use a teaspoon to scoop and shape the meat mixture into small sized meatballs and drop them into a bowl (I normally make them just a little bigger than the fish balls back home). Once they are all ready, drop them slowly into the pot and increase heat for a while, slowly stirring initially so that the balls will not break or crumble. Again, reduce the heat once the sauce has reached boiling point and simmer for a while (25 to 30 minutes, I think), stirring once in a while. Add salt to taste.

Tip: Don’t forget to add some olive oil in your boiling water when cooking your spaghetti. Once cooked in the time as instructed on packet, drain and run cold water through it for a few seconds before melting a few dollops of butter on the still hot and steaming spaghetti. I just think it taste better this way. Try it!


(I apologise for the pic (for all my own pics for that matter), because I could not be bothered to take out my digicam each time I take any pics and so I just use the nearest camera around which is the camera on my hp! (Nokia n70). I find the pics are quite good when taken outdoors but inside the house, I need to switch on all my lights for a barely acceptable pic. Hope they don't hurt your artistic sensibilities too much.)

Monday, May 08, 2006

Blame It On The Tiramisu

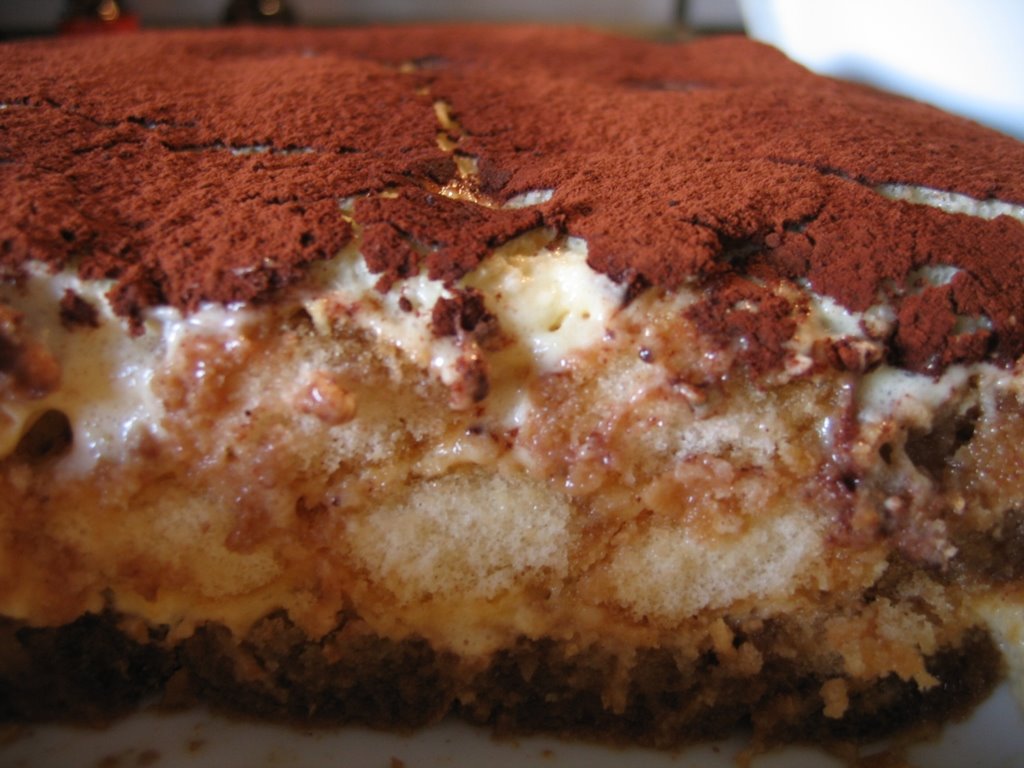
I first tried making tiramisu a few years ago when I spent 1 year in London to follow my husband who was at the time pursuing a certain academic aspiration. The dessert was for our Raya (Eid) 'open house' scheduled for one weekend in the month of Syawal and we were expecting quite a few people to turn up as we had quite a few friends and family in London at the time. Unfortunately for me, my supposedly delectable dessert did not turn out as expected and to save my dignity from going to tatters in front of all those people who will surely, surely look at me in horror and disgust, I unashamedly told my maid to err...claim that she made it and that it's actually a Sundanese dessert! (She's Sundanese, you see.) None of my guests came from there so I found a way to escape my tiramisu disaster. My maid didn't mind being used as the scapegoat (although she was indeed a great cook and could not possibly have created anything short of perfection) and she conceded to my request, as always, without a flicker of her Sundanese eyelid. It was quite funny, actually, for when people started to complement what I thought was a culinary disaster, I almost succumbed to all the praises to claim that it was my own cooking after all, 'prepared by these two hands', I would have let them know! But I resisted the urge to embarrass myself further in the eyes of my maid who would surely laugh at me till her sides split when she was alone in the kitchen.

I am, I think, a sort of a perfectionist when it comes to cooking food. On this however, I am a little confused about myself as I find, although I require the results to be perfect, in the process of making something, I rarely perfectly follow the recipe. And yet I demand it (perfection) in the result. From the tiramisu incident however, my husband has understood my zero flaw requirement and therefore, in order to keep me from distress has always volunteered to take the blame as the ‘incompetent cook’ every time my cooking appears to be not up to that required level when guests are coming. ‘That’s ok..’ he says when I start to whine over the hot cooking pot. ‘Just tell them I made that.’ And horribly, horridly, that comforts me, the proud and insecure woman that I am.


I am, I admit, quite ashamed of myself.

But I cannot help it. It’s not my fault! I blame, the people who have given me an abundance of skills but only limited to the basics and never anything more. And thus I thirst for some recognition on the meagre amount of knowledge that I have and my pride does not allow my knowledge of my own discrepancies to be known to others. And that’s my true flaw.

Hey, how did this piece of writing turn so self-denouncing? I intended for a few paragraphs of introduction before I give out my tiramisu recipe, which I am happy to say, has been praised and frequently requested during any gathering at my house. I blame the memory of my all too perfect first maid for this digression!


I retrace my steps back to that point in my story above where my ‘Sundanese dessert’ was appreciated after all. And so, I did not give up on the dessert which even in disgrace was enjoyed by many. After trying and failing a few more times, my luck improved when some friends came to visit me from Germany. They apparently have mastered the unyielding Italian dessert and gave me some tips and suggestions which I took into account during my next attempt. My tiramisu then turned out to be the perfect heavenly dessert it was supposed to be and I have not blamed anyone for my tiramisu ever since.

Tiramisu

4 egg yolks
1 tub mascarpone cheese (around 1 cup)
1 pot whipping cream (10floz/ 280ml)
3 tbls sugar
1 packet sponge fingers
coffee for dipping
cocoa for dusting
chocolate curls for decoration (optional)

1. Combine egg yolks and sugar in the top of a ‘double boiler’ i.e. your yolks in a glass/metal bowl, resting on a pot/saucepan of boiling water. Reduce heat to low, and cook for about 6-8 minutes, stirring constantly. Remove from heat and whip yolks until thick and lemon coloured.

2. Add cheese to whipped yolks. Beat until combined. In a separate bowl, whip cream to stiff peaks. Gently fold into yolk mixture and set aside.

3. Pour coffee onto a saucer, dip fingers in coffee one by one until coffee is absorbed into part of each finger and line the bottom and sides of a large glass bowl. Spoon half of the cream filling over the sponge fingers. Repeat process; dip sponge fingers, line and spoon filling. Dust top with cocoa and chocolate curls. Refrigerate several hours or overnight. For the chocolate curls, use a vegetable peeler and run it down the edge of the chocolate bar whilst holding the chocolate bar over the tiramisu.

p/s: I use 2 oval shaped pyrex bowls for this recipe. Fits perfectly.

Monday, April 24, 2006

I Pine..Oh Yes, I Pine..

Yesterday I had a craving. A craving so strong it was a pining. For beef rendang and nasi himpit. That craving made me go to the kitchen the moment I stepped into my house after the weekly grocery shopping with my husband and children to defrost the beef in the microwave.

As my hands start the therapeutic (oh yes, I do consider cooking therapeutic nowadays!) process of cooking, my mind, as usual, starts to wander. And as it embarked on its journey as I cleared up the kitchen surfaces and started to wash the dirty dishes left from breakfast, I realise it was wandering towards home. Home in Melaka where my mother and grandmother live in a fairly large bungalow near the sea. With an Indonesian maid that seemed to grow fatter and fatter every time I saw her.

In that very vivid picture in my mind I saw my mother standing in front of the stove, that old spatula in her hand, vigorously stirring food. Cooking the Rendang. And when finally the smell of the beef and coconut milk concoction wafted through my kitchen, my heart felt heavy. That smell. With that smell came so many happy memories. Of Eid (Hari Raya). Of my sisters and I gathering in the kitchen filling up ketupat casings for cooking in the big pot outside, water in it already boiling merrily. Of my mother’s black mood every Raya eve for she wants everything to be ready and perfect for the day after and yet her daughters are lounging in front of the TV, doing nothing. How young and irresponsible and unhelpful we were! And how normal for people so young. We were, most of us home from boarding school for the holidays and all everybody wanted to do was really to sit back.) What happy memories that smell brought to me. How happy that smell made me.

The memories are happy memories because they are memories of home. Even though they may include memories of a scolding or a slapping(!). That’s right. I was slapped once. For something I did not do. It still hurt to think about it. I wasn’t believed and so I was punished. But I have forgiven. She is my mother after all. She has her own trial and tribulations. Who can escape their own share of those. Memories of my mother, father and grandmother will always be fond memories that I cherish and treasure, no matter what.

Ah, yes. I am truly and honestly homesick.

But a phone call home can help. And the rendang will help too, once consumed. It is my very own cure for homesickness. Perhaps you have your own cure but this is mine. For those of you who are living abroad, away from Malaysia like me and want a piece of home, made simply and without too much fuss but tastes just as good, try my rendang recipe below.
Good Luck!

Ingredients

500gm beef (not lean, cut into small pieces 4-5cm)
1 can of coconut milk
3 cms galangal (pounded just a bit)
2 sticks of lemon grass (pounded just a bit)
2-3 teaspoons of turmeric powder
1 slice of asam keping (what’s that in English?)
2 tsps of chilli powder
salt to taste
kerisik – dessicated coconut (choose a type that does not look too dry) - about 1 tbls, browned without oil and pounded to a rough paste

to be blended:
1 large onion
3 cloves garlic
3 cms ginger

Method:
Put everything except the asam keeping and kerisik in a wok or a pot. Salt can be added later too. No oil needed. Make sure everything covers the beef very generously. Increase heat to boil and then reduce heat and simmer until coconut milk is very thick. Don’t forget to stir once in a while to avoid the mixture from sticking to the bottom of the wok/ pot. Then add the asam keping and stir a little bit more until the rendang is even thicker and any flowing liquid is nearly dried up. Then add the kerisik and stir some more. Add salt to taste. Rendang should be ready when it is very thick, gravy not flowing and not liquid anymore. Eat with rice or nasi himpit.

Nasi Himpit

Rice cooked traditionally in a large pot with lots of water and then pressed down hard in a flat pan and left to cool. Once cooled, they will be cut into cubes.

Away from Malaysia, what you need is just the rice that they sell in supermarkets that are sold in small boxes. Inside the boxes, cleaned rice is packed in small packets (that have small holes on them) and can be straightaway chucked into boiling water. Once cooked according to the instructions on the box, the westerners will tear up the plastic and pour the cooked rice into a plate. That’s how the westerners seem to like their rice – dry and not starchy. This product can be easily found in any supermarkets in England.
In order to make nasi himpit though, this product is wonderful. What you need to do is just chuck 2-3 of these packets in a large pot of boiling water and let it cook for at least 2 hours. Make sure the packets are immersed in the boiling water and top up on the hot water if you need to. Make sure the nasi himpit is cooked evenly by turning over the packets once in a while. The nasi himpit is ready to be drained and cooled on a rack or a towel when the plastic is filled and nearly bursting (but not!) with the over cooked rice. Once cooled (normally for a few hours in room temperature or a shorter period in the fridge), the rice packets will be hard. Cut the packets into 2 before removing the plastic and cut further into cubes to be served with the rendang.

Sunday, April 16, 2006

The Perfect Chicken Rice

To me, the rice must be moist, must be fragrant with ginger. The chicken must be sweet, the skin crisp and dark. There must a good vegetable sidedish. Don't forget the chilli dip for the chicken. But most important of all - it must not taste of Ajinomoto (a popular taste enhancer used by almost all restaurants in Malaysia!). I don't care too much for the soup if the rice is moist. So there.

There is no doubt a variety of chicken rice recipes out there. I'm not a big fan of the Hainan type although I think they're not bad. I don't really like the fried chicken rice. To me they taste like yesterday's chicken rice leftovers, fried so that it would not expire. Well, at least that's what I would do if I have some chicken rice leftovers. Although in my house, I am happy to say, that is indeed a rare occurence.

I'm happy to share with you the chicken rice recipe that I have been using for the past few months. I have tried several recipes since a few years ago but to me this one is by far the best. Or, the real situation maybe, I've finally perfected it since now I actually have time to practice cooking it at least once a week! Let me first give you some tips about cooking the rice.

(Warning! I am not a professional cook. I do not use sophisticated ways to cook. What follows is the traditional method of cooking rice, passed down from generation to generation in most Malay families. It works very well but it also depends on the rice - some may need more water to be nice and moist, some don't require too much and may be too soft and sticky if the same amount of rice and water is used. My own measured method is also given, using a cup and mls of water but again, this depends on the size of your own measuring cup which may be different from mine. I say this because I have two measuring cups of different makes and they measure '1 cup' differently! ). Right. Let's get to it!

After washing the rice 2 or 3 times, try to spread the rice evenly over the bottom of the rice cooker pot and measure the level of the washed rice with your pointer finger and thumb. That level should be the perfect water level needed for your rice, above the surface of the washed rice. Comprende?

While cooking any rice dishes that include onions, ALWAYS increase the level of water a bit to maintain the moist rice texture as the onions may absorb the water. You need to look at the chart inside you rice cooker pot for this to be easier. Example: If the perfect water level for your rice is '3 cups' (according to the chart) just add more water so that the liquid reaches '4 cups'. This is a rough estimation but going '4 cups' from '3 cups' when cooking chicken rice works perfectly for me. Saying this, in some other rice dishes when the rice is 'fried' first with the onions or the other ingredients of a dish before the water is added, the water level may be maintained at the perfect level as the rice is already half cooked. Phew!...I hope all that made sense!


Ok, before I prattle on, let's get on with the recipe.

Ingredients

Good long grain rice - 4 cups (this will require 1150ml chicken soup for the perfect water level, but must add a little bit more than that for a moist chicken rice - do not simply pour extra liquid into the rice, use the chart inside the pot to gauge how much you need!)
1 chicken (cut into 8 pieces)
Chicken stock cubes - (the recipe says 2 cubes but I just use half a cube - unfortunately without the cube, it will not taste like the chicken rice at the shops in Malaysia at all(!) so you should at least put a little bit in.)
Cooking oil - just a little bit for the soup, a lot to fry the chicken later on
Water - need to be more than 1150ml to accommodate the extra liquid needed and for the side dish soup, if required.
Salt to taste

To be pounded/blended together in the blender with a little bit of water:

Ginger - size about as big as your thumb :-). make sure it's young ginger i.e. when you cut it there should not be a rough texture in the centre of the ginger, it should be smooth and easy to cut through. Be generous with the ginger.
1 Large onion
3 Cloves garlic

Marinade:

3 tbls honey
4 tbls oyster sauce
3 tbls soy sauce
1 tbls sesame oil
1 tbls fennel seed
, pounded (jintan manis)

Method:

Heat up a little oil in a pot. Add the blended mixture and stir fry until fragrant. Add the chicken and the stock cubes. Add water. Increase heat to boil and then reduce heat and leave for a while to get the good chicken soup taste. Add salt to taste. Remove the chicken pieces and drain. Marinate chicken with the marinade above for at least 1 hour and fry in medium heat until crispy. If fire is too hot, the chicken will burn very quickly due to the honey. Heat up what's left of the marinade and pour onto fried chicken. Really yummy! Make sure you don't over-fry your chicken so that it won't turn hard. Don't need to fry for long as the chicken is already cooked inside!

Use the prepared soup to cook the rice. Rice must be washed first and drained. While washing, you should measure the amount required for the perfect water level (using your fingers) and drain that amount into a measuring cup so that you'll know exactly how much water is needed. Pour the cleaned rice into the rice cooker pot. Add the soup and the extra bit more to make it moist (Again, for an estimate, just look at the chart inside the pot and increase the soup level by '1 cup' as stated on the chart). Stir the rice and soup and taste it. The mixture must taste a LITTLE salty or else the rice will be bland. Add a bit more salt if necessary(!) I also love to add 3-4 more slices of ginger in the mixture to make it more fragrant. Use the rest of the soup as a side dish.

Chilli Dip

As usual, Malaysians always need something hot to spice up their food. For the chicken rice, a chilli sauce is prepared on the side to pour on the rice or on the chicken.
For this dip/sauce: blend some fresh red chillies (4-5) and some garlic (2-3 cloves) with a little bit of the chicken soup. Squeeze some fresh lime into it or add some vinegar to balance the taste. May add just a pinch of sugar if want to.

This chicken rice is good. It doesn't use any food enhancers and yet it still tastes very nice. The chicken is sweet and succulent and the dip is pleasant. Hope you'll try it and also enjoy the result as I have. If you're used to cooking plain rice, just forget the confusing explanation on how to cook rice above and cook your rice as u normally do. But remember, there must be a little bit more liquid than usual for any rice dish that has onions etc in it for the rice to be nice and moist.

Urap Tomato

Now, this vege side dish is good and to me, the perfect accompaniment to chicken rice. Well, to me, at least. Try it! It's simple and no cooking is required. Mix the ingredients below and leave for a while in the fridge for it to cool.

3 tomatoes
1 large onion
3 green fresh chillies
(slice all the above into very thin slices)
2 tbls pounded dried shrimp
2 lime
sugar